What is a Pediatric Dietitian and How Can They Help

What is a Pediatric Dietitian and How Can They Help?

Hey there, I’m Ms. Yeting, a Pediatric Dietitian, and the founder of Simple Balance Nutrition. If you’re struggling with your kids’ eating habits, you’re not alone. Feeding children can be a real challenge! That’s why I’m passionate about ensuring every parent has access to a pediatric dietitian like myself—I’m here to lend a hand!

My specialty? Working alongside parents to revolutionize how they feed their children and how their children eat. Together, we can empower your children to embrace new foods, enjoy a diverse range of options from various food groups, sit down to meals happily without any battles, and cultivate a lifelong healthy relationship with food and their bodies.

If you’re ready to dive in and work with a pediatric dietitian one-on-one, you can book an appointment with me right here. Whether you’re dealing with picky eating, a child seemingly “addicted to sugar,” weight concerns, or just need help getting nutritious meals on the table, you’ve come to the right place.

In this post, I’ll walk you through what a pediatric dietitian does, why it’s crucial to seek out a specialist in pediatric nutrition for your children, and how you can go about finding one. Plus, I’ll give you a sneak peek into what you can expect when working with a pediatric dietitian, so you can be confident in finding the perfect fit for your family.

So, if you’re ready to kickstart your journey towards happier, healthier eating habits for your children, let’s get started!


WHY CHILDHOOD NUTRITION IS IMPORTANT 

The global obesity crisis has worsened in recent years, with research pointing out how more and more children deal with this harmful condition. Pediatric dietitians and nutritionists are here to help prevent children from developing unhealthy body mass indexes and to support those who are on their weight loss journey.

A century ago, the notion of a child needing a dietitian would have been met with skepticism. Back then, the food they ate was generally more nutritious and less processed. Plus, the idea of seeking professional guidance for children’s diets wasn’t widely accepted.

Fast forward to today, we are dealing with more obese children than ever with pre-diabetes and diabetes, inflammatory bowel syndrome, autoimmune diseases, skin issues, and a variety of food intolerances and allergies. It’s a serious global issue that demands attention.

Despite the gravity of the situation, the importance of addressing children’s dietary preferences and involving pediatric dietitians in the conversation has become increasingly evident. Parents are recognizing the significance of seeking expert guidance to ensure their children’s nutritional needs are met and to tackle health challenges head-on.

In essence, while the prevalence of childhood obesity presents a significant challenge, the role of pediatric dietitians has never been more crucial. By working together to promote healthier eating habits and address nutritional concerns, we can strive towards a healthier future for our children.


WHAT DOES A PEDIATRIC DIETITIAN DO?

A pediatric dietitian is dedicated to collaborating with children and their families to enhance their dietary habits, nutrition, and feeding routines. There are various reasons why a child might benefit from consulting a pediatric dietitian, which I’ll delve into below.

During the initial consultation with a pediatric dietitian, a comprehensive nutrition assessment is conducted. This typically involves:

  1. Reviewing the child’s medical history in detail.
  2. Assessing growth parameters such as height, weight, and growth charts to track progress over time.
  3. Evaluating the child’s weight and height history to identify any trends or concerns.
  4. Gaining insight into the child’s typical dietary intake and preferences.
  5. Engaging in thorough discussions and asking pertinent questions to better understand the child’s unique needs and circumstances.

Based on this assessment, the pediatric dietitian will develop dietary modification recommendations and work closely with the family to implement these recommendations effectively. The frequency and duration of follow-up visits will vary depending on the individual needs of the child.

Overall, the primary goal of a pediatric dietitian is to support children and their families in optimizing their nutritional intake, fostering healthy eating habits, and addressing any dietary concerns or challenges they may encounter along the way.


WHEN TO SEE A PEDIATRIC DIETITIAN 

Wondering when it’s time to seek guidance from a pediatric dietitian? Here are some common scenarios where their expertise can make a significant difference:
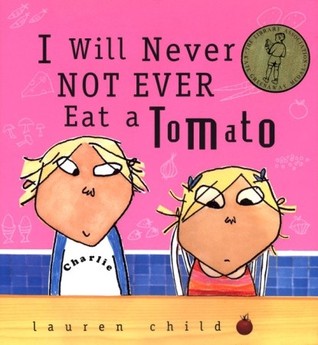
1. Picky Eating

If mealtimes at your home resemble battlegrounds due to a picky eater, a dietitian can offer valuable support. They can help alleviate mealtime stress and create strategies to encourage your child to explore new foods. Picky eating is often seen in toddlers and preschoolers but can persist if left unaddressed, potentially impacting growth. Early intervention with a dietitian’s comprehensive assessment can help set your child on the right path. Check out my online course PEACEFUL MEALTIMES to help your children start trying new foods.

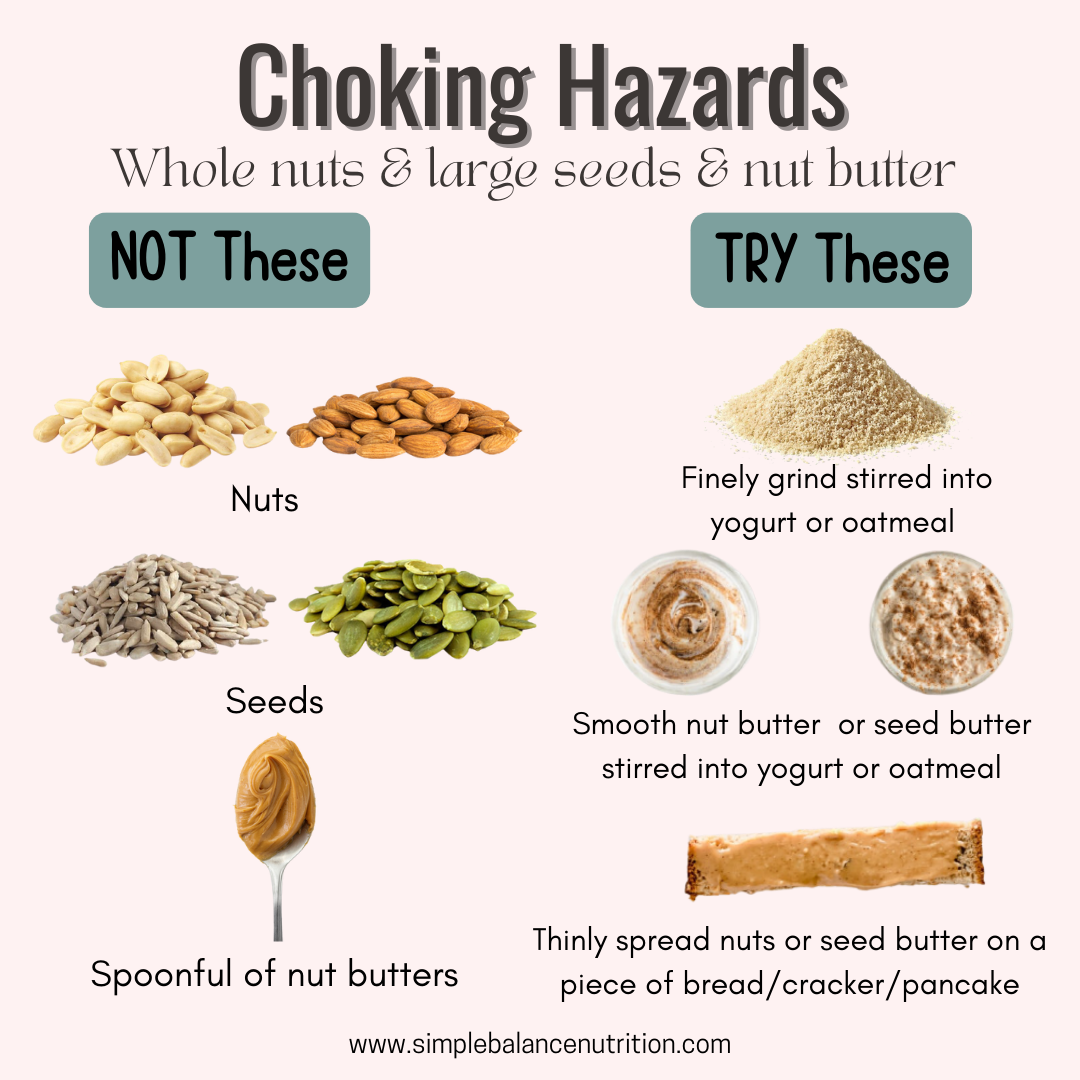
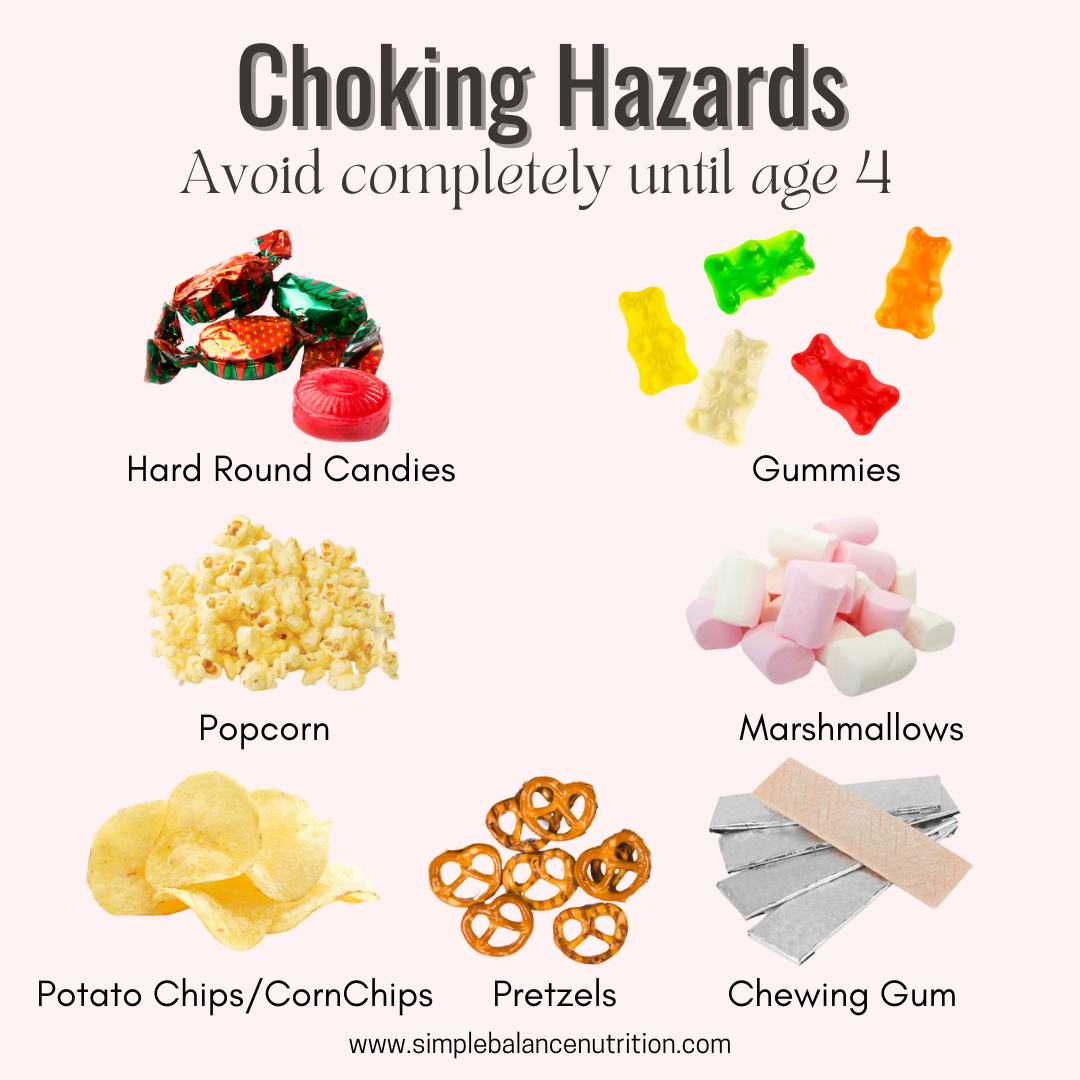
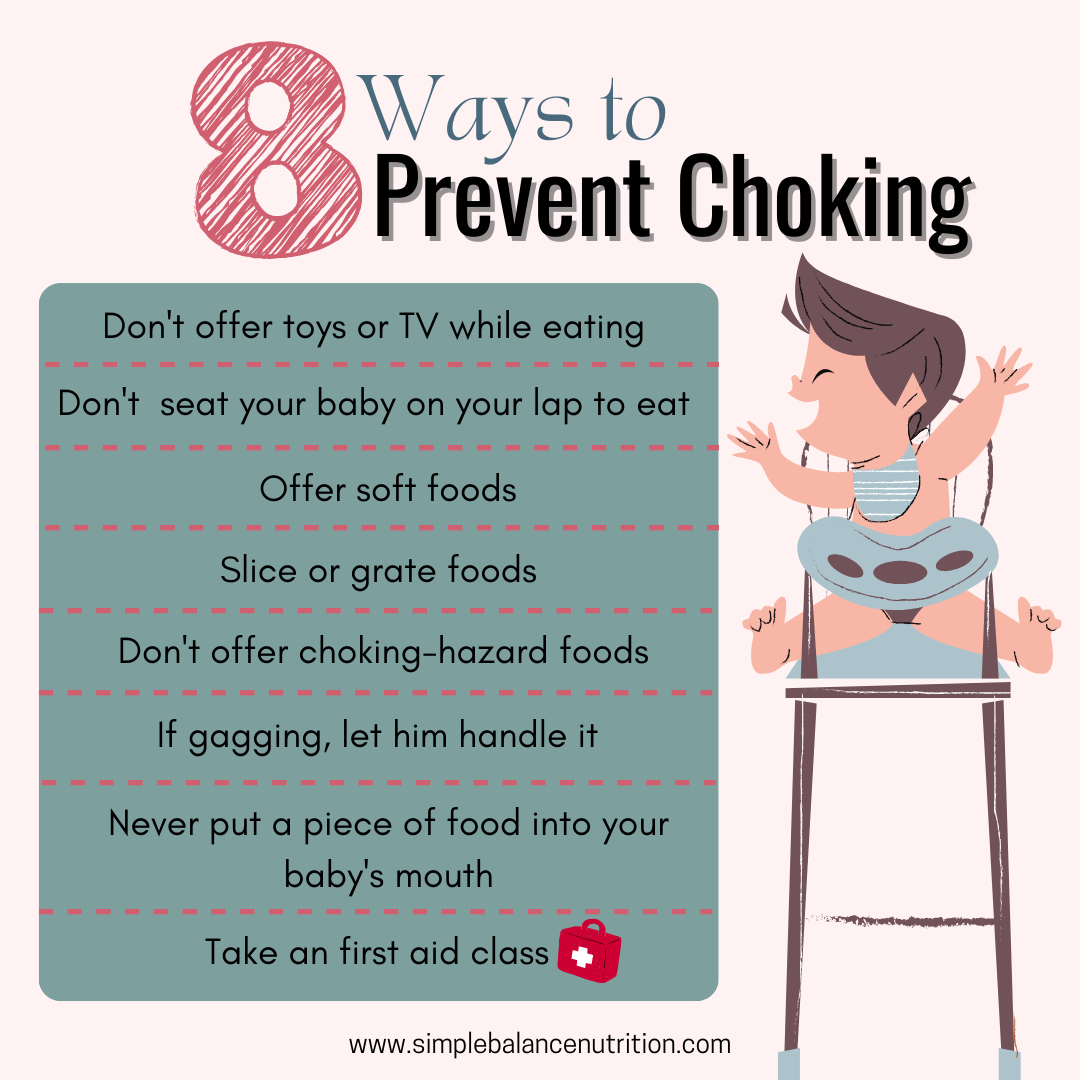
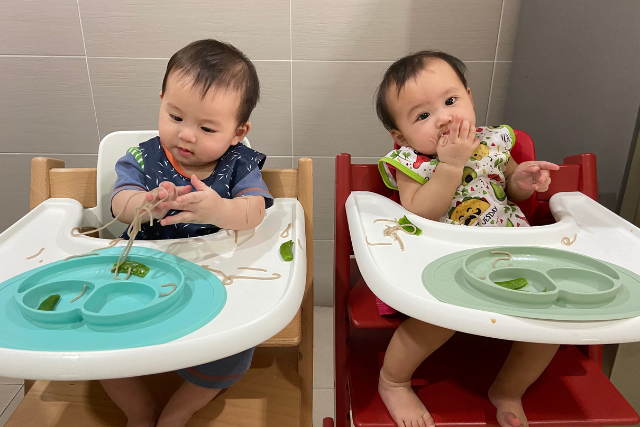
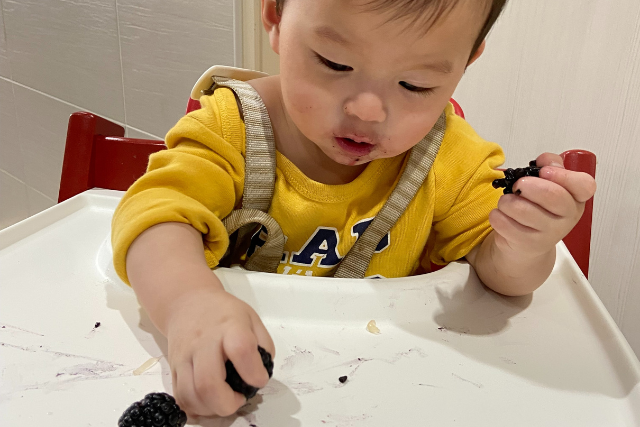
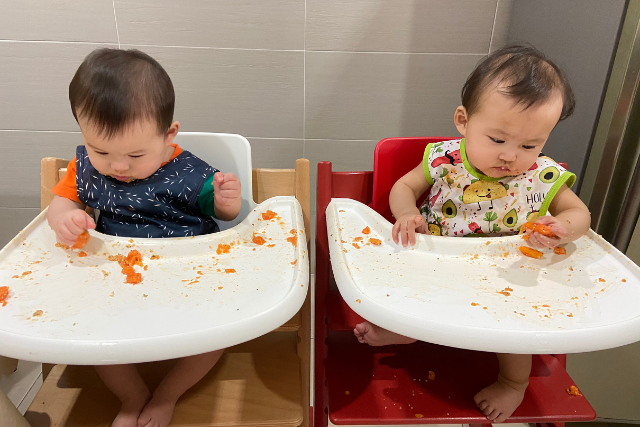
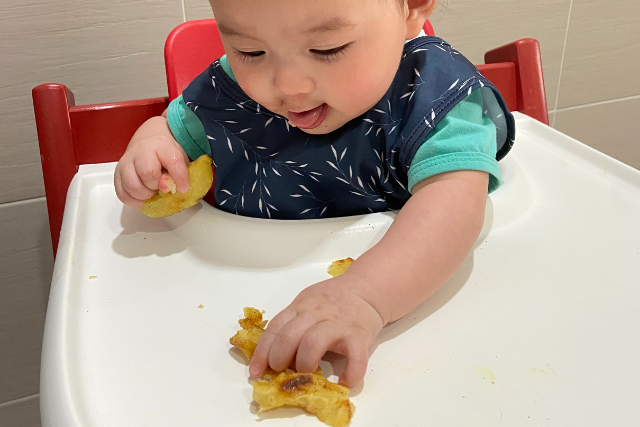
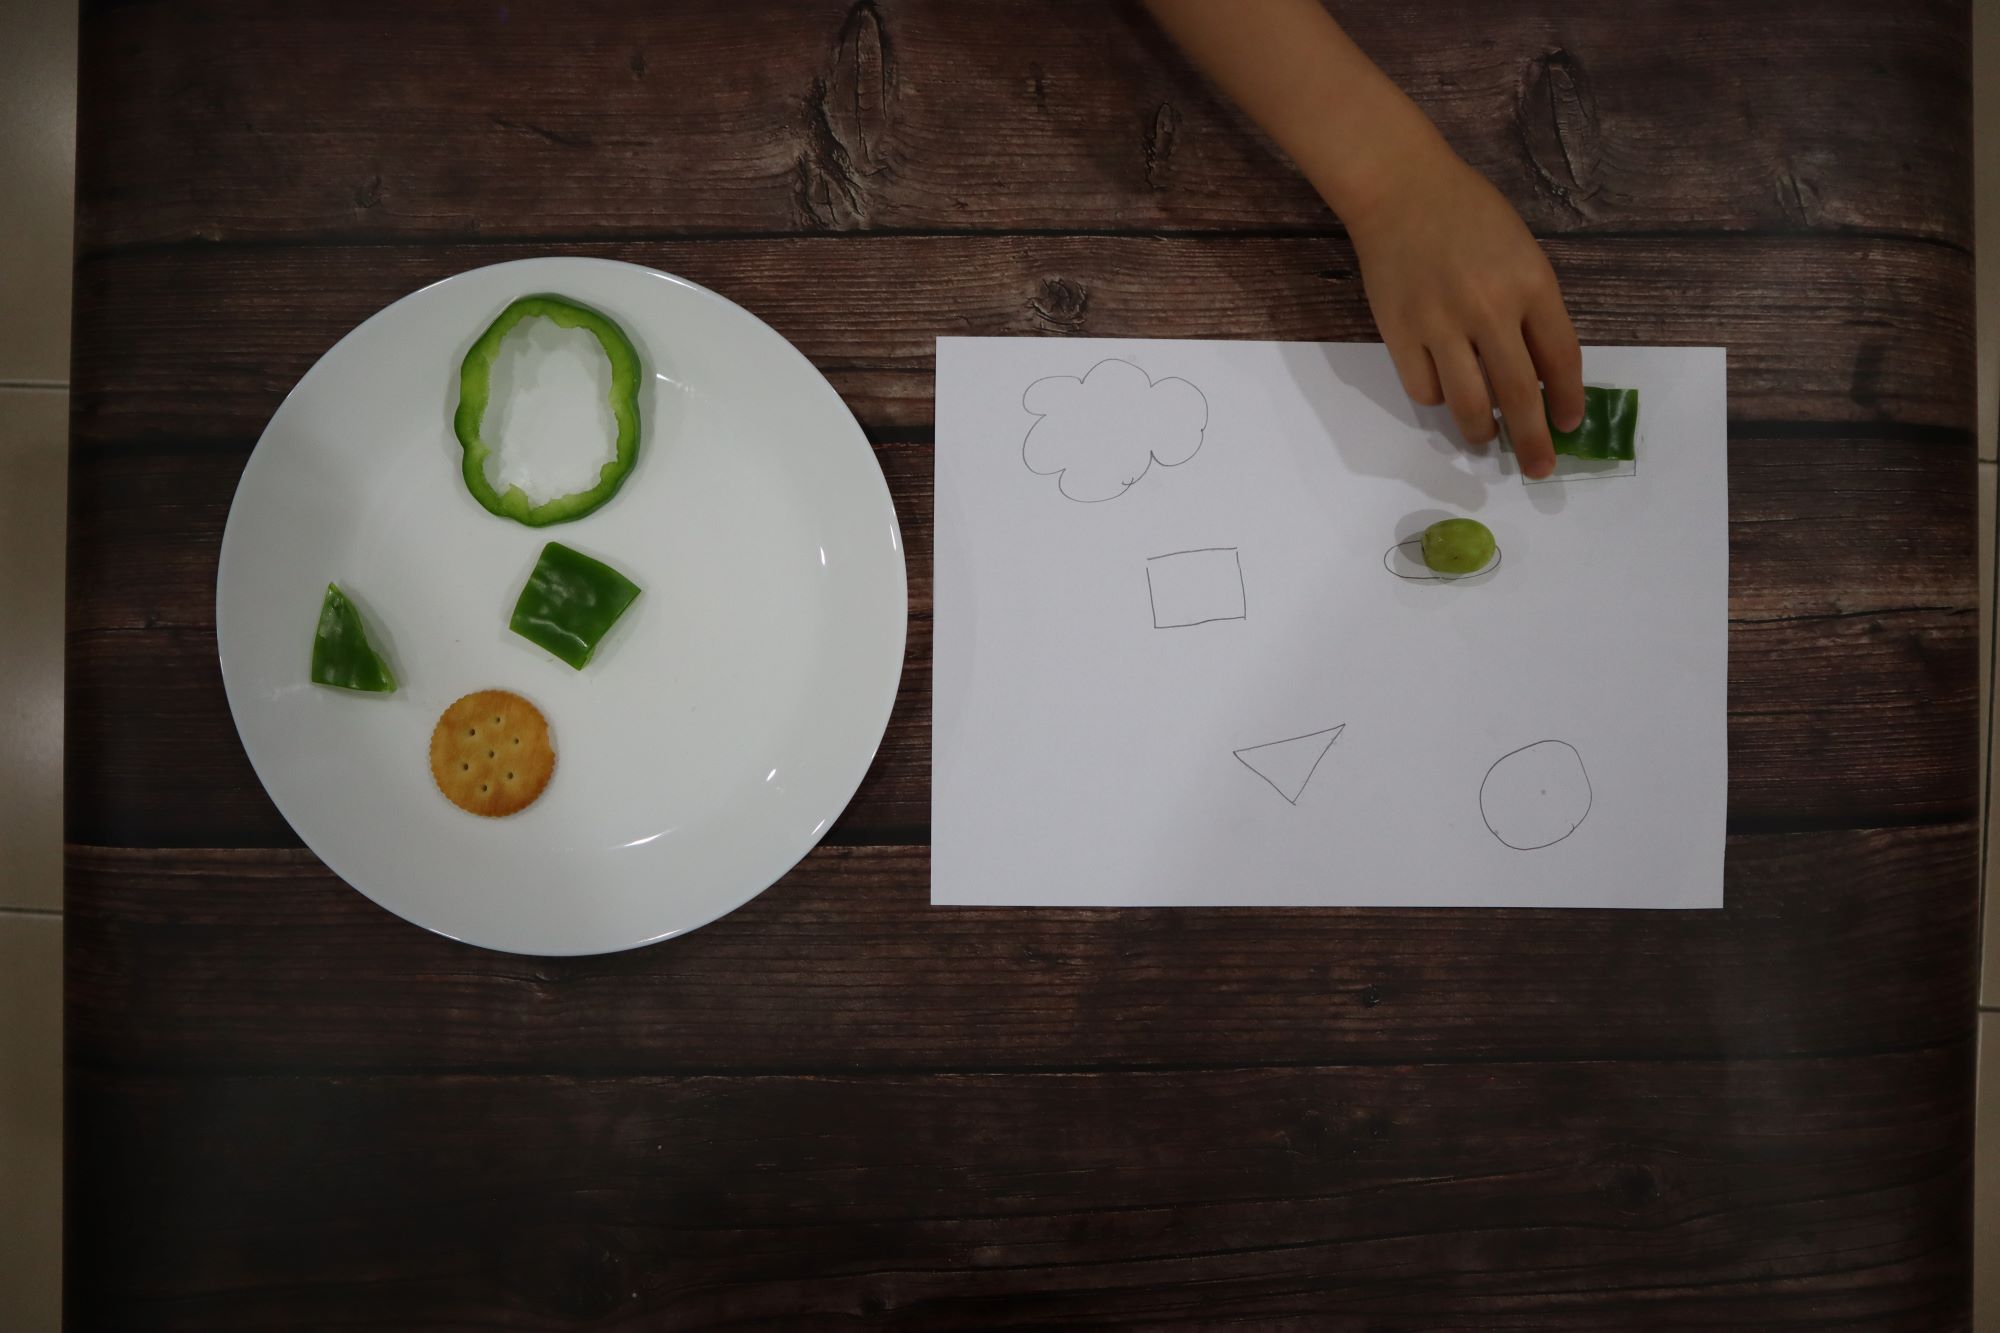
2. Starting Solids and Baby-Led Weaning

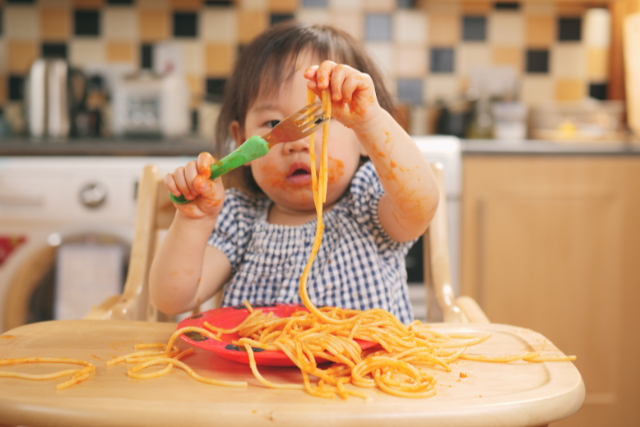
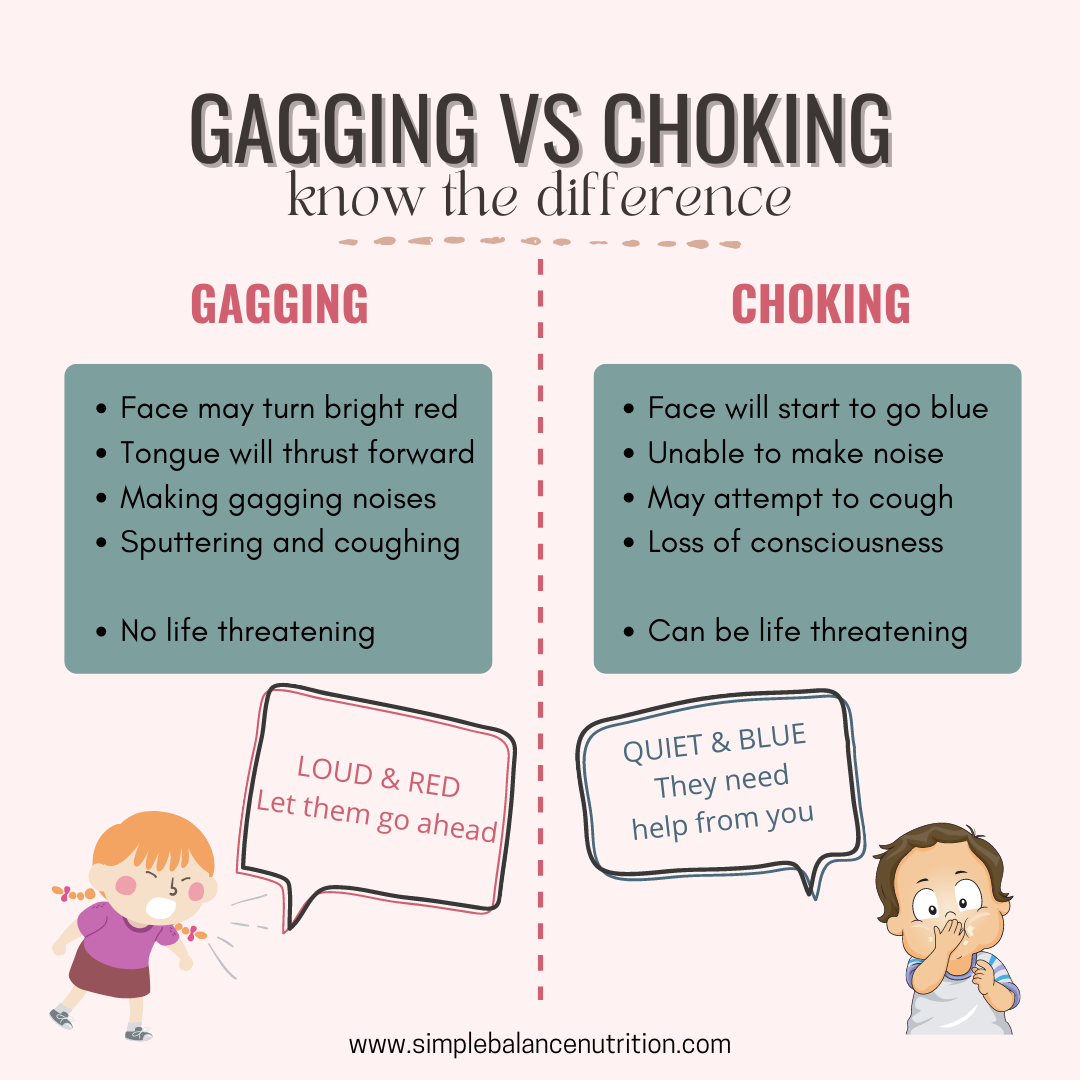
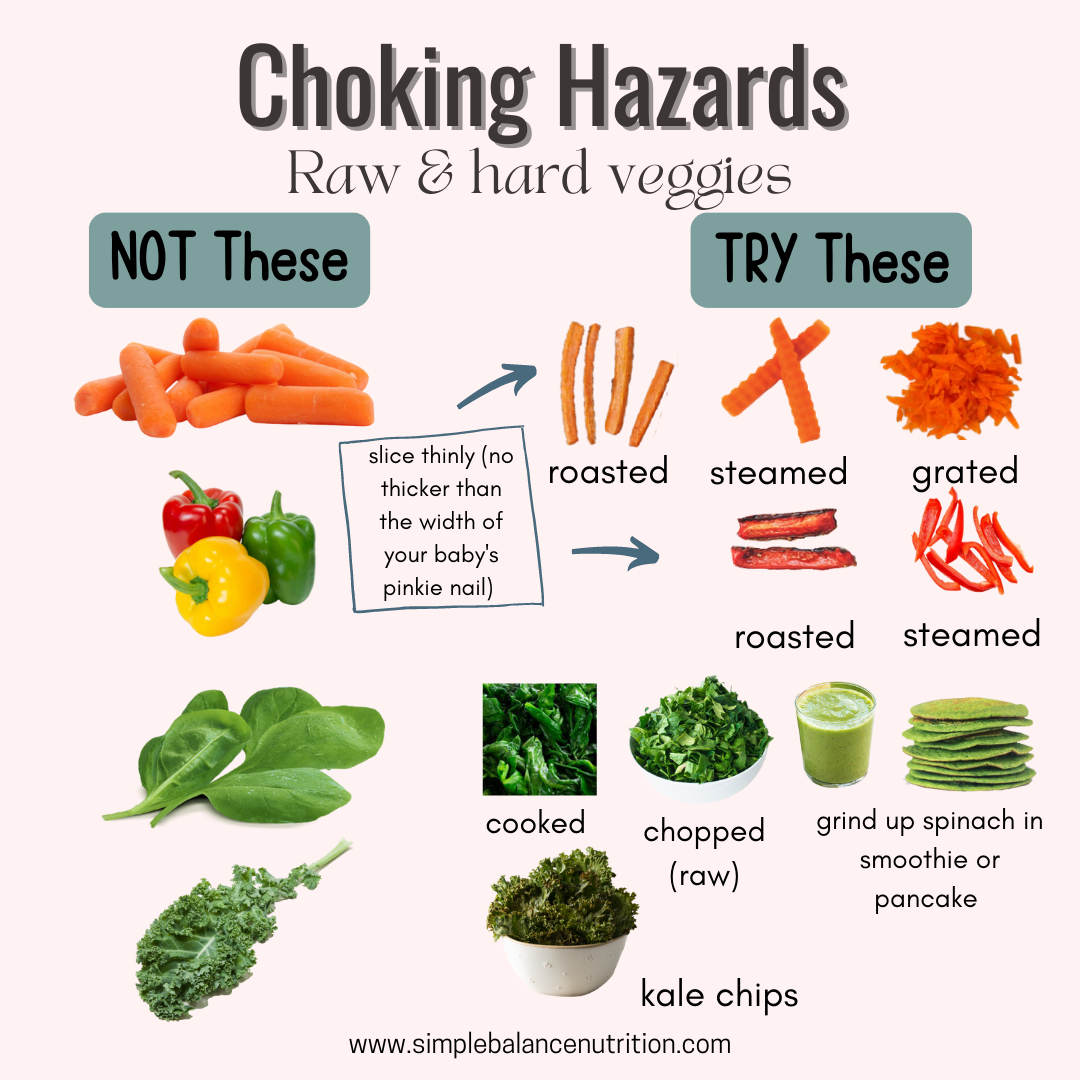
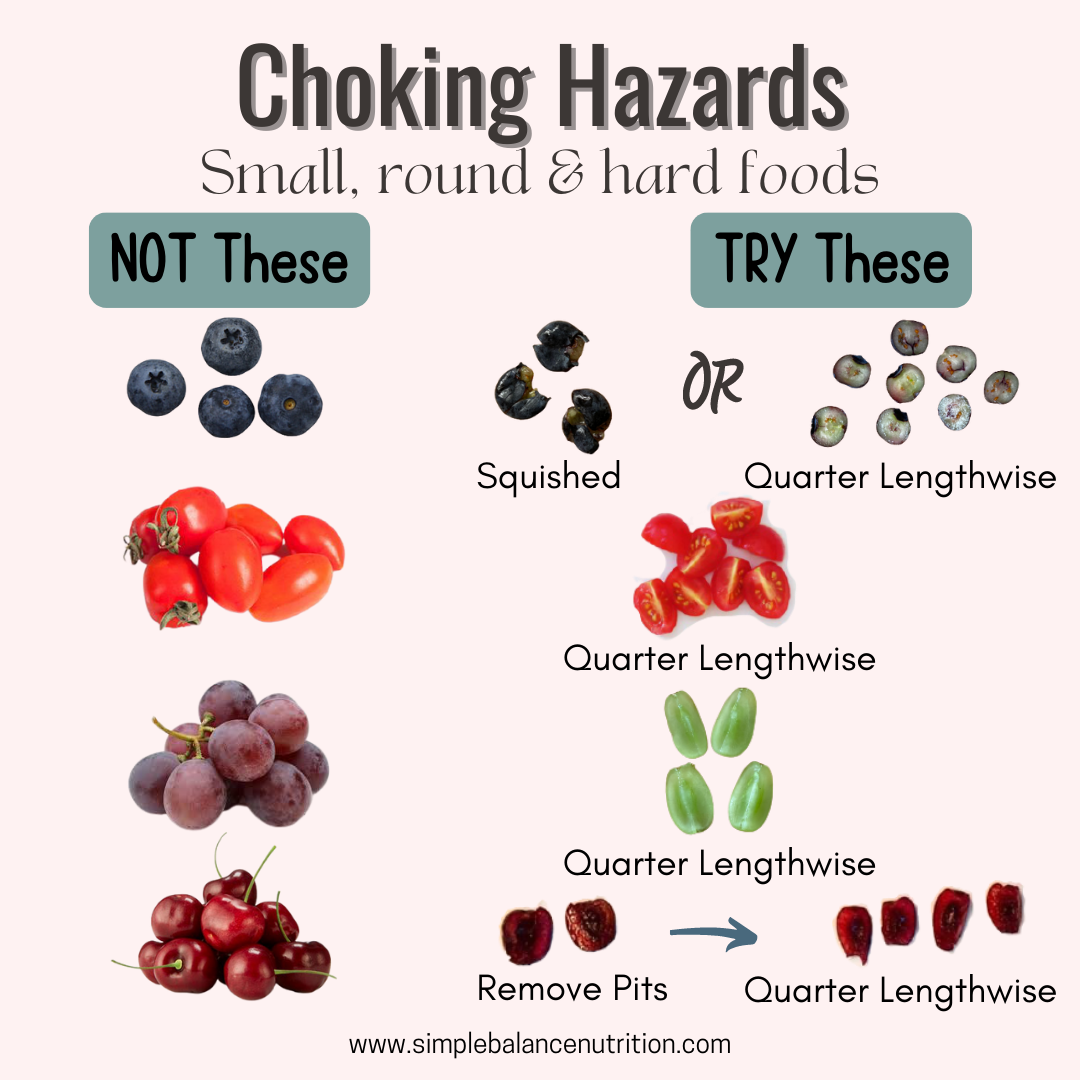
Navigating the transition to solid foods can be daunting for new parents. A dietitian can provide guidance on your baby’s nutritional needs, appropriate food choices, and transitioning through different textures. For those considering baby-led weaning, a dietitian can offer tailored advice and meal ideas to support this approach.

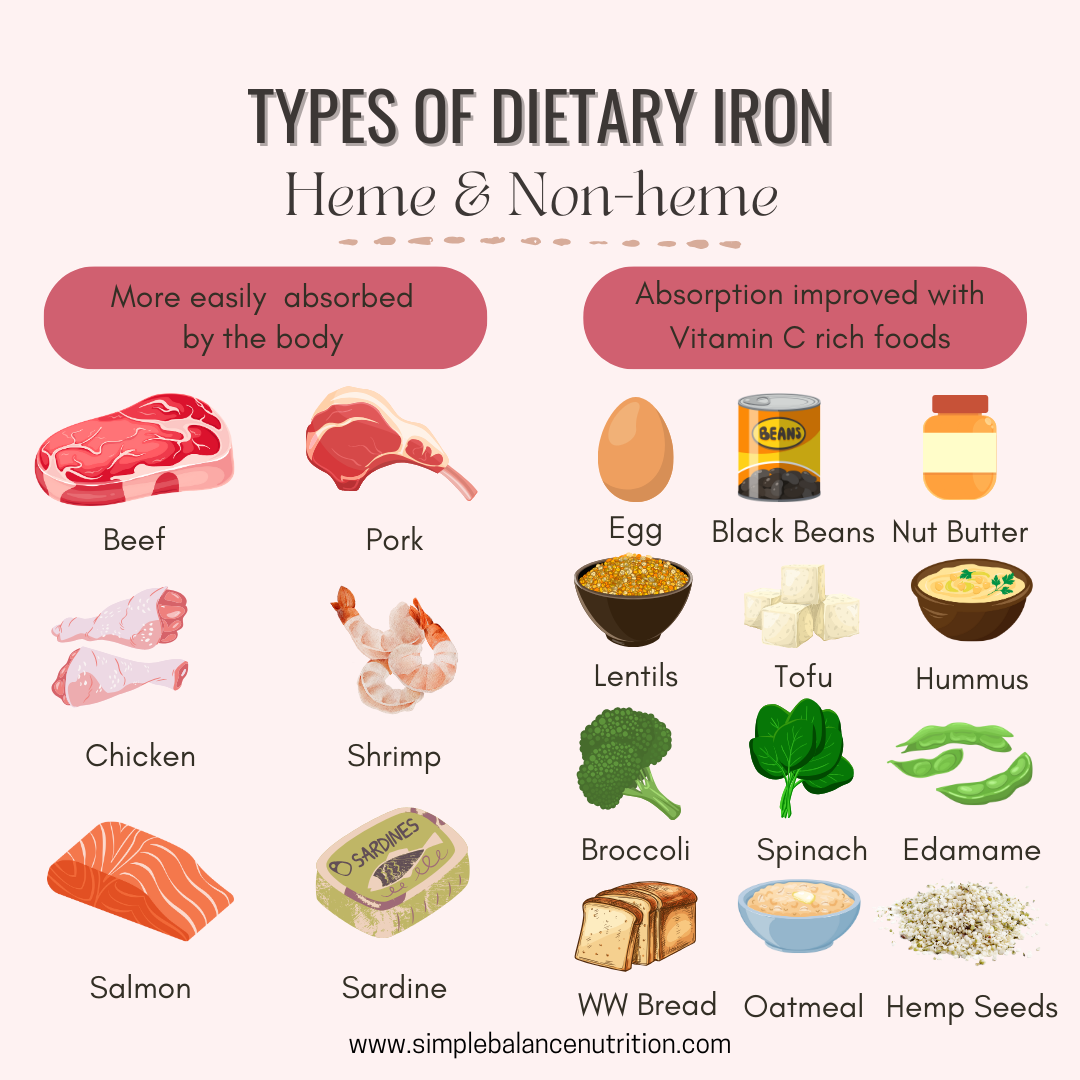
3. Nutrient Deficiencies

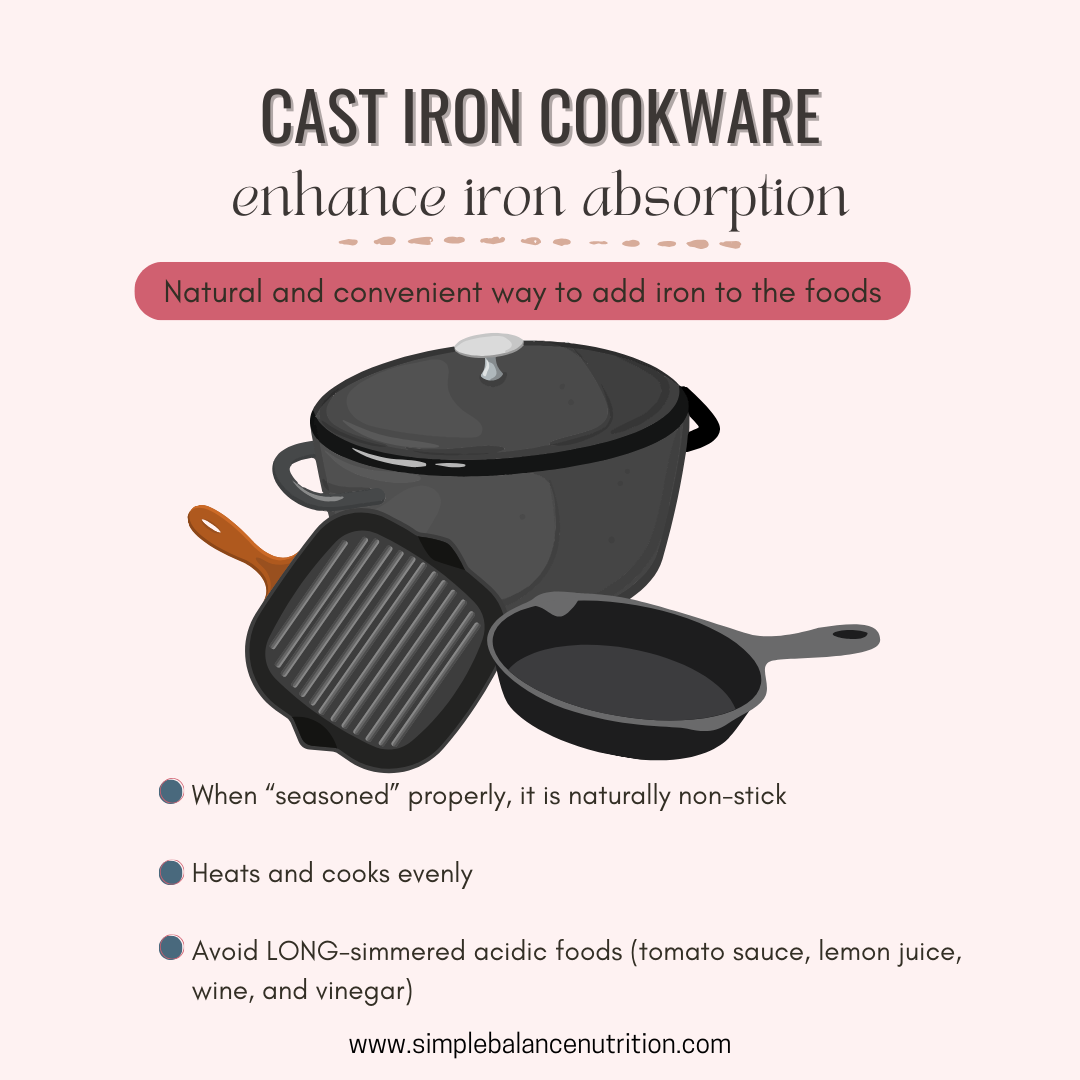
If your child is diagnosed with a nutrient deficiency, such as iron or vitamin D, a dietitian can help rectify the imbalance through dietary adjustments or supplements. Iron deficiency, particularly common in toddlers consuming excessive milk alternatives, requires careful management to restore optimal levels.

4. Constipation

Constipation is a prevalent issue in children, often influenced by diet. A dietitian can analyze your child’s dietary habits and recommend adjustments to promote regular bowel movements. They may suggest incorporating probiotic-rich foods or supplements and offer easy-to-follow recipes for constipation relief.

5. Child Athletes

Proper nutrition is vital for young athletes to support performance, recovery, and growth. A dietitian specializing in pediatric nutrition and sports can provide tailored guidance to optimize your child’s nutritional intake, considering their high activity levels and rapid growth.

6. Weight Concerns

If there are concerns about your child’s weight or growth, a pediatric dietitian can conduct a comprehensive assessment to determine if intervention is necessary. It’s essential to approach discussions about weight sensitively and privately, focusing on overall health rather than appearance to prevent negative associations.

7. Food Allergies

Children with food allergies may require guidance to ensure they receive adequate nutrients while avoiding allergens. A dietitian can assist in identifying suitable alternatives and designing a balanced diet that meets their nutritional needs.

8. Other Health Concerns

There are numerous other reasons to consult a pediatric dietitian, including general growth and nutrition concerns. If you have any concerns about your child’s diet or nutrition, consider discussing them with their pediatrician to explore the possibility of a referral to a dietitian.

Remember, the expertise of a pediatric dietitian can play a pivotal role in addressing various dietary challenges and promoting optimal health and well-being for your child.


HOW TO FIND A PEDIATRIC DIETITIAN 

When seeking a pediatric dietitian to address your child’s nutritional needs, consider the following avenues:

  1. Word of Mouth: Tap into your social network by asking fellow parents in your child’s daycare, kindergarten, or school for recommendations. Parents who have already engaged the services of a pediatric dietitian may offer valuable insights, or the educational institution itself might have information on reputable professionals.
  2. Pediatrician Referral: Consult your child’s regular pediatrician for referrals to pediatric dietitians in your area. Pediatricians often collaborate with dietitians and can provide trusted recommendations based on your child’s specific needs.
  3. Virtual Pediatric Dietitians: If you’re seeking assistance for non-medical nutrition issues such as picky eating or healthy meal planning and prefer a virtual option, you can consider working with a remote pediatric dietitian. Virtual consultations offer convenience and accessibility, allowing you to connect with a qualified professional regardless of geographical location.
  4. Local Dietitian Recommendations: If you’re having difficulty finding a local pediatric dietitian, reach out to other dietitians in your area for recommendations. Many dietitians maintain professional networks and can direct you to colleagues who specialize in pediatric nutrition. Additionally, dietitians often refer clients to specialists outside their own expertise, ensuring you receive tailored support.

By exploring these avenues and seeking referrals from trusted sources, you can connect with a qualified pediatric dietitian who can address your child’s unique nutritional needs and support their health and well-being.


BOTTOM LINE 

A pediatric dietitian is a registered dietitian specializing in working with children, equipped with extensive experience in pediatric nutrition. They offer invaluable support and guidance across various nutrition-related challenges, including picky eating, introducing solids, weight and growth concerns, addressing nutrient deficiencies, and devising healthy meal plans tailored to children’s needs.

Whether you opt for a local or virtual dietitian depends on your specific circumstances and preferences. The crucial factor is finding a professional with a solid background in pediatric nutrition, ensuring the best possible care for your family.

With over 13 years of dedicated experience in pediatric nutrition, I’m here to support you every step of the way. Whether you’re ready to schedule a consultation or simply have questions about your child’s nutrition, feel free to reach out. I offer a range of free resources to kickstart your journey towards better health and nutrition for your child.

Don’t hesitate to contact me for personalized assistance or to learn more about my qualifications and expertise. Your child’s well-being is my top priority, and I’m committed to providing the support and guidance you need to navigate the challenges of pediatric nutrition with confidence.

Safe Ways to Introduce Nuts to Baby

Safe Ways to Introduce Nuts to Baby

Undoubtedly, introducing nuts to a baby can be scary, as they pose both a choking hazard and rank among the top nine allergens.

However, introducing nuts to your baby between the ages of 6 and 12 months can actually help lower their chances of developing an allergy. So, how can you safely introduce nuts to your baby?

WHAT CAUSES AN ALLERGY

An allergy occurs when the immune system erroneously recognizes a protein in a specific food as a potential threat. Subsequently, the immune system becomes activated and releases substances like histamines to combat this perceived danger. This immune response triggers inflammation, which results in the symptoms of an allergic reaction.

BENEFITS OF NUTS FOR BABY 

Nuts offer a wealth of nutrients and health benefits, and there are numerous ways to include them in a baby’s diet.

Different nuts have different nutrient profiles, but generally, they are rich in fats crucial for a baby’s growth and development. Additionally, they provide essential protein for muscle growth and tissue repair, along with fiber to support a healthy digestive system. Nuts are also a source of important micronutrients such as calcium, iron, folate, vitamin E, zinc, and more.

WHEN TO INTRODUCE PEANUTS AND OTHER NUTS TO BABY 

Back in 2000, parents were advised to avoid the introduction of allergenic foods for the first 1 to 3 years of life, with the belief that this would reduce the risk of developing allergies. However, recent research has shed light on this matter, revealing that delaying the introduction of allergenic foods not only fails to provide protection against allergies but can actually raise the risk of developing them.

A significant study called the LEAP study, conducted in England from 2006 to 2014, focused on infants at high risk of developing peanut allergies, including those with severe eczema, an egg allergy, or both. This study found that babies who were introduced to peanuts before the age of one and consumed them regularly in their diet had an 86% reduction in peanut allergy compared to children who avoided peanut.

Specifically, the group of children who avoided peanuts had a 17% incidence of peanut allergy, while the group that regularly included peanuts had a substantially lower rate of 3%. These findings underscore the importance of early and consistent introduction of allergenic foods like peanuts to reduce the risk of allergies in high-risk infants.

In early 2017, the National Institute of Allergy and Infectious Diseases (NIAID) release new guidelines specifically addressing peanut allergies. These guidelines received endorsement from prominent organizations such as the American Academy of Pediatrics, National Institute of Health and the American Academy of Allergy, Asthma, and Immunology, Malaysian Society of Allergy and Immunology , Canadian Society of Allergy and Clinical Immunology .

These guidelines recommend the introduction of allergenic foods at around 6 months of age, when babies are developmentally ready for solids (not before 4 months), and that all babies should have these foods by 12 months. This includes babies at high risk of allergy, unless an allergy to that particular food has already been confirmed.

Furthermore, once allergenic foods are introduced, it is beneficial to continue to offering them regularly, approximately twice a week. This practice helps in maintaining tolerance and reducing the risk of developing allergies.

WHAT NUTS CAN BE INTRODUCED TO BABY 

PEANUTS VS TREE NUTS

Peanuts and tree nuts, despite both being categorized as ‘nuts,’ do not share a botanical relationship and originate from distinct plant families. Surprisingly, peanuts aren’t true nuts; they belong to the legume family, such as soybeans, chickpeas or kidney beans. Interestingly, most individuals with a peanut allergy can typically consume other legumes safely.

  • Peanuts
  • Almonds
  • Brazil nuts
  • Cashews
  • Chestnuts
  • Hazelnuts
  • Macadamia nuts
  • Pine nuts
  • Pecans
  • Pistachios
  • Walnuts

We know that peanuts are not related to tree nuts, so most people tend to be allergic to either peanuts OR tree nuts. However, approximately 1 in 3 individuals with a nut allergy are allergic to both peanuts and tree nuts.

It’s now known that there is some cross-reactivity can occur between different foods, as well as between pollen and certain foods or latex and certain foods. So, having a tree nut allergy doesn’t necessarily indicate an allergy to all types of tree nuts, but it significantly increases the risk of being allergic to others. For this reason, each type of nut needs to be introduced separately, ideally leaving 2-3 days between each one.

NUT BUTTERS

You have the option to prepare your own nut butter or purchase a commercially available brand of any of the nuts listed above. If opting for a store-bought variety, ensure that it is free from any additives like sugar, salt, oils, or preservatives. It should only contain the specific nut you intend to introduce.

After individually introducing each type of nut to your baby, using mixed nut butter can be a convenient method to continue exposing your baby to a variety of nuts simultaneously, rather than incorporating each nut separately. This approach simplifies the process of diversifying your baby’s nut consumption while ensuring they receive a broad range of nut-related nutrients.

A useful tip for nut butter: If your nut butter is too thick and clumpy, you can transfer a small amount to a microwave-safe bowl and heat it in 20-second intervals, stirring each time, until it becomes slightly warm. The heat will aid in smoothing out the nut butter and making it thinner in consistency.

GROUND OR FINELY CHOPPED NUTS

Another way to introduce nuts to your baby is by finely grinding them and then sprinkling them on top of pureed foods, oat cereal, avocado, banana, or other solid foods. To grind the nuts, you can take a small handful and pulse them in a blender or food processor until they are finely chopped. It’s essential to check the size of the nuts while pulsing every 20 seconds to avoid turning them into a paste or nut butter. Alternatively, you can finely chop a small quantity of nuts on a cutting board. Once you have the finely chopped nuts, you can sprinkle them onto your baby’s food, leave them as they are, or stir them in for added texture and flavor.

ARE NUTS A CHOKING HAZARD FOR BABY?

Whole nuts pose a choking hazard and should not be offered to children under the age of 4. Additionally, chunky nut butter with large lumps should be avoided for the same reason. To ensure safety, serve nuts to young children in alternative forms such as puffs, nut powder, finely chopped, in the form of flours, thinned nut butter, or incorporated into purees. These preparations minimize the risk of choking and make nuts more suitable for young children’s consumption.

ARE NUTS A COMMON ALLERGEN?

Peanuts and tree nuts are all classified as top food allergens, so it’s important to be vigilant about any potential reactions when introducing foods containing nut ingredients to your baby. Allergic reactions can occur within minutes to hours after consumption, so it’s advisable to offer such foods at a time when you can closely monitor your child for a few hours, rather than during dinner.

Be attentive to possible symptoms of an allergic reaction, which may include itchy rashes, hives, vomiting, difficulty breathing, swelling of the lips and tongue, and, in severe cases, anaphylaxis. If any of these symptoms occur, promptly contact your pediatrician. In the case of anaphylaxis, call for help immediately.

FEEDING TIPS WHEN INTRODUCING NUTS 

  1. Nuts pose a choking hazard for babies and young children, so it’s important to avoid offering whole nuts, chunks of nuts, or large dollops of nut butter to ensure their safety.
  2. Serve nuts earlier in the day: When introducing a new type of nut, offer it during breakfast or lunch so you can closely monitor your baby for any potential allergic reactions.
  3. Start with a small amount: You don’t need to give your baby a large serving to check for reactions. Begin with a small quantity to gauge their tolerance.
  4. Never rub on your baby’s skin: This will not help to identify a food allergy and can actually increase the risk of an allergy developing.
  5. Keep it on the menu: After successfully introducing a specific type of nut into your baby’s diet, aim to include it regularly in their weekly meal plan. This consistent exposure can potentially reduce the risk of developing allergies later in life.

HOW TO INTRODUCE PEANUTS OR TREE NUTS TO BABY 

Begin by introducing one type of nut early in the day, allowing you to closely monitor for any potential symptoms. To ensure safety and to thoroughly assess for any overlooked reactions, it is recommended to reintroduce the same variety of tree nuts or peanuts the following day, preferably around the same time. To monitor any allergy reactions, it’s best to wait 1-2 days before switching to a different type of nut.

Here are some of my favourite ways to introduce peanuts and tree nuts to your baby’s diet:

FOR TRADITIONAL WEANING 

  1. Add a small amount of warm water to a teaspoon of nut butter. Blend until you reach a smooth consistency, never serve a globs of nut butter as it can pose a choking hazard for young children.
  2. Infant cereal or oatmeal: Mix nut butter or finely chopped nuts into baby’s meal for added flavor and nutrition.
  3. Purees: Add a small amount of nut butter or finely chopped nuts to homemade baby purees for added texture and nutrition.
  4. Smoothies: Blend nut butter into a fruit or yogurt smoothie for a creamy, nutty flavor.

FOR BABY LED WEANING OR FINGER FOODS 

  1. Pasta tossed with pesto (if making at home, you can change which nuts or seeds you use as the base).
  2. Nut butter thinly spread on toast, pancakes, or waffles strips.
  3. Sprinkle finely chopped nuts on slices of banana, avocado, sweet potato wedges, oatmeal, applesauce, or yogurt.
  4. Mixed finely chopped nuts into the batter of pancakes, waffles, and muffins. Use a small amount of almonds to replace some of the regular flour used in baked goods.
  5. Nut butter yogurt dip.

The above methods offer versatility in introducing nuts to your baby’s diet, allowing you to choose the most appropriate option based on your baby’s age and preferences.

RELIABLE DIAGNOSIS OF FOOD ALLERGY IS IMPORTANT

It is important that allergies are accurately diagnosed and confirmed by a medical doctor. Your child’s doctor may conduct skin prick tests or blood tests to assess allergen-specific IgE levels, which can aid in confirming or ruling out potential allergens. However, it’s important to note that while these tests can establish the presence of an allergy, they do not predict the severity of an allergic reaction in individuals with allergies.

It’s also worth mentioning that some other forms of allergy testing lack scientific evidence and are therefore not recommended.

BOTTOM LINE 

Many foods are suitable for young children, but whole nuts are a choking hazard until at least age 4, and spoonfuls of nut butters can be too sticky for little mouths. The good news is that there are numerous delicious ways to serve nuts, providing healthy fats, protein, and essential nutrients. Nuts are rich in vitamins and minerals like Vitamin E and iron, making them a valuable addition to children’s diets for enhanced nutrition. I hope this blogpost can help you safely incorporate nuts into your baby’s diet while minimizing risks and promoting healthy eating habits.

Did you know that I offer personalized one-on-one nutrition counselling for children and families? If this is something you’s like to learn more about, check out my service.

Can My Baby Get Enough Iron Using Baby Led Weaning

Can My Baby Get Enough Iron Using Baby Led Weaning

While I’m a fan of Baby Led Weaning (BLW), the concern about not getting enough iron intake is real, especially since many moms like to offer fruits and veggies as starter foods for their babies. In fact, this is one of the top mistakes parents make when practising BLW!

Iron deficiency is estimated to be the most common deficiency worldwide. It can lead to anemia, impaired growth and development, as well as impaired cognitive function, including delayed attention, learning difficulties and social withdrawal. According to Malaysia’s National Health and Morbidity Survey (NHMS) 2022 Maternal and Child Health report, 46.5% of children between 0-5 years old were anemic. Therefore, in contrast to the popular saying, “food before 1 IS NOT just for fun.”

INCREASED NEEDS

By the age of 6 months, your baby’s iron stores, acquired during pregnancy, begin to deplete. This depletion is influenced by factors such as the mother’s iron levels during gestation, delayed cord clamping at birth, and the baby’s gestational age at birth. Around eighty percent of the baby’s iron stores accumulate during the third trimester of pregnancy. If your baby is born “overdue,” it can be one of the advantages in this context.

While breast milk contains a smaller quantity of iron (0.5 mg/L) compared to formula, but the iron present in breast milk is significantly more easily absorbed – approximately 50% absorption, as opposed to the 10% absorption rate in iron-fortified formula. Consequently, both breastfed and formula-fed infants receive comparable amounts of iron.

As infants reach six months of age, they continue to obtain some iron from their breast milk or formula, but introducing solid foods becomes crucial to provide a supplementary source. These solids are commonly referred to as “complementary foods,” as they complement the nutritional intake from a baby’s milk.

The question then arises: How much additional iron do babies require, and where should they get it from to ensure adequate intake?

HOW MUCH IRON DOES MY BABY NEED?

So, how much iron does a full-term, healthy-weight baby need?

In North America, the Recommended Dietary Allowances (RDA) for iron

  • BABIES 0-6 MONTHS: 0.27 mg/day
  • BABIES 6-12 MONTHS: 11 mg/day
  • TODDLERS 1-3 YEARS: 7 mg/day

In Malaysia, The Recommended Nutrient Intake (RNI)

  • BABIES 6-11 MONTHS: 9 mg/day (10% bioavailability); 6 mg/day (15% bioavailability)
  • CHILDREN 1-6 YEARS: 6 mg/day (10% bioavailability); 4 mg/day (15% bioavailability)

Therefore, I think it depends where you are. The good aiming point is about 7-8 mg of iron daily for 6-12 month olds who consume meat. For vegetarian babies, a better target is probably 9-11 mg per day.

It is important to note that 11mg (RDA) is an average requirement (from breastmilk/formula and food) for ages 7 to 12 months. Babies’ iron needs don’t suddenly surge overnight, it’s a significant increase that we should strive to approach as quickly as possible. There can be a big difference in size and appetite between a 7 month old and a year old child. 12-month olds will need more iron than seven-month olds, but they can also eat more food, so they will work up to this amount gradually. The great news is that babies progress very quickly to consuming a fair amount of food with BLW.

Furthermore, you do not need to be counting the exact amount in milligrams of iron your child consumes each day – this is wearisome and stressful. The main goal is to provide as many iron-rich foods throughout the day as possible.

SIGNS OF IRON DEFICIENCY

If you’re worried that your child isn’t getting enough iron, here are some signs and symptoms of iron deficiency you can watch for:

  • Slow weight gain
  • Little or no appetite
  • Pale skin
  • Always tired
  • Cold hands and feet
  • Brittle nails
  • Poor immunity (often sick or frequent infections)

To prevent anemia, the American Academy of Pediatrics recommends conducting a blood test on all 12-month-olds to assess their iron levels. In Malaysia, if you’ve concerns about your child’s iron intake or notice signs of deficiency, it is advisable to consult a doctor and request a blood test.

If the levels are significantly low, it is necessary to provide your child  with iron supplements for a few months, as relying solely on food is unlikely to be enough to restore iron levels to normal levels.

CAN BABY LED WEANERS GET ENOUGH IRON (RESEARCH)

According to Baby-led Introduction to Starting SolidS (BLISS) study, two hundred families from New Zealand were divided into two groups: the BLISS group and the control group.

In the BLISS group, parents were taught to prevent choking, growth faltering and how tonsure an adequate intake of iron-rich foods while self-feeding. They were encouraged to offer at each meal:

  • High iron food (e.g., red meat and fortified cereals)
  • Energy-rich food (e.g., cheese or avocado)
  • Easy-to-eat food ((e.g., fruit or veggie)

A study originating from the BLISS trial, titled “Impact of a Modified Version of Baby-Led Weaning on Iron Intake and Status: A Randomized Controlled Trial,” examined the effects. Nutrient intake at 7 and 12 months of age was assessed through weighted 3-day diet records. Additionally, the iron status of the babies was analyzed using a blood sample taken at 12 months of age.

The results indicated that 83% of babies in both the control and BLISS groups had adequate iron levels, with 5% in the control group and 7% in the BLISS group showing signs of anemia. No significant differences were observed between the two groups in terms of iron levels and stores at either 7 or 12 months of age.

This is indeed promising news! With additional education on the safe implementation of BLW, it has the potential to serve as a nutritious and safe approach to introducing solid foods.

So, Can BLW Babies Get Enough Iron?

The short answer is YES! It is possible.

The main source of iron for traditionally weaned babies is iron-fortified rice cereal, which is usually skipped in BLW. But, baby led weaners can absolutely get enough iron in their diets! In fact, BLW babies typically consume meat if it’s part of the family’s diet, whereas traditionally weaned babies might not eat meat right away at the beginning of starting solids. As long as parents focus on offering iron-rich foods at each meal, there is no significant difference in the iron status between babies following the BLW approach and those being fed purees.

Vegetarian and vegan infants might encounter more challenges in obtaining sufficient iron, yet this goal is achievable through strategic planning by parents. By conscientiously providing iron-rich foods or incorporating rice cereal, the necessary iron intake can still be achieved.

WHAT FOODS ARE HIGH IN IRON

There are two types of iron sources: heme and non-heme. Heme iron, is found in animal products like meat, fish, and poultry, the human body has a high absorption rates at approximately 20%. Conversely, non-heme iron is found in plant sources like soy, lentils, beans, and even eggs, but it is less easily absorbed by the body, with only around 10% uptake. It is crucial to recognize that iron sources vary in their bioavailability.

I don’t believe in focussing on numbers and exact amounts of iron/foods to give, as this approach can lead to unnecessary stress. However, I do think it is useful to know the amounts of iron found in realistic serving sizes of some of the foods mentioned below. Here are a few examples along with approximate iron levels:

HEME-IRON FOODS:

  • Liver (chicken, turkey, lamb), cooked* = 6.2-9.7 mg
  • Ground beef (75 g) = 1.3-2.2 mg
  • Ground chicken/pork (75 g) = 0.8-1.2 mg
  • Chicken (75 g) = 0.4-2 mg (dark meat has higher levels than white meat)
  • Sardines, canned (75 g) = 1.7-2.2 mg
  • Tuna, light, canned in water (75 g) = 1.2 mg

*While liver is an excellent source of iron, it contains an excessive amount of preformed Vitamin A, which could be toxic. The Upper Limit recommended for ages up to 3 years is 600 micrograms, whereas just 1 oz of liver contains over 5,000 micrograms. Plus, the liver is the filter for our body, and it can also contain metals.

How to serve heme-iron foods in BLW:

  • Ground meat sauce
  • Baby burgers or meatballs
  • Offer no-added salt canned sardines as finger food
  • Pressure or slow-cooked pork or beef roast, shredded
  • Pork ribs or chicken legs (removed of gristle)
  • Boneless chicken thighs, cut into finger-sized strips
  • Fish or salmon cakes

NON-HEME IRON FOODS:

  • Eggs (2 eggs) – 1.2 – 1.8 mg
  • Edamame (1/2 cup) = 1.9-2.4 mg
  • Tofu (¾ cup) = 2.4-8 mg
  • Lentils (¾ cup) = 4.1-4.9 mg
  • Beans (white, kidney, navy, pinto, black, etc.) (¾ cup) = 2.6-4.9 mg
  • Hummus (¼ cup) = 1.4 mg
  • Oatmeal, instant, cooked (¾ cup) = 4.5-6.6 mg
  • Wheat germ (1 tbsp) = 1.2 g
  • Spinach, cooked (½ cup) = 2.0 -3.4 mg
  • Hemp hearts (1 tbsp) = 1.4 mg
  • Blackstrap molasses (1 tbsp) = 3.6 mg

How to serve non-heme iron foods in BLW:

  • Eggs fried and sliced in strips or scrambled
  • Firm tofu strips sautéed or roasted.
  • Blend soft tofu into smoothies for variety.
  • Add blackstrap molasses to baking.
  • Sprinkle wheat germ or hemp hearts on yogurt or blend into a smoothie.
  • Serve hummus on a strip of toast.
  • Black beans are a good finger food to practice the pincer grasp.
  • Smush larger beans like chickpeas with your finger, so they’re not a choking hazard.
  • Bean or lentil patties.
  • Nut butters on toast fingers.

TIPS TO GET ENOUGH IRON WHILE USING BLW (6-12 months)

  1. Continue providing adequate breast milk or formula as the baby’s main source of nutrients. At this age, solid foods serve as complimentary options to to boost baby’s nutrient intake and gradually prepare their digestive system for a complete transition to solids.
  2. Ensure that every meal includes a source of iron, both heme and non-heme iron.
  3. Incorporate fortified powder infant cereal baked into finger foods. You can also substitute half of the flour in your pancake recipes with fortified infant cereal.
  4. Pair iron-rich foods with vitamin C rich foods, to increase the absorption of non-heme iron in the body. Consider top[ing fortified pancakes or cereal with fruit compote; serve lentils in stewed tomatoes and adding spinach to a fruit smoothie.
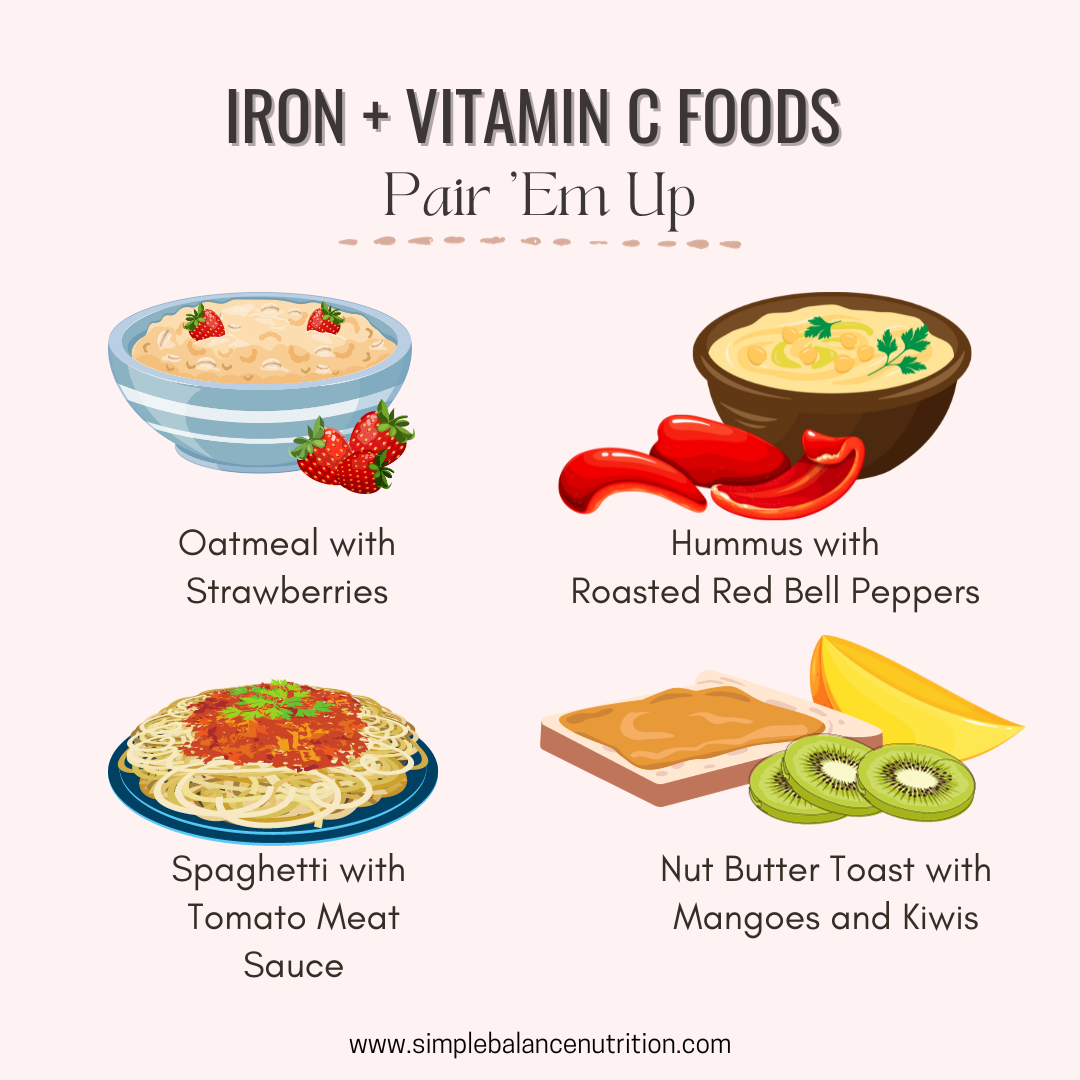
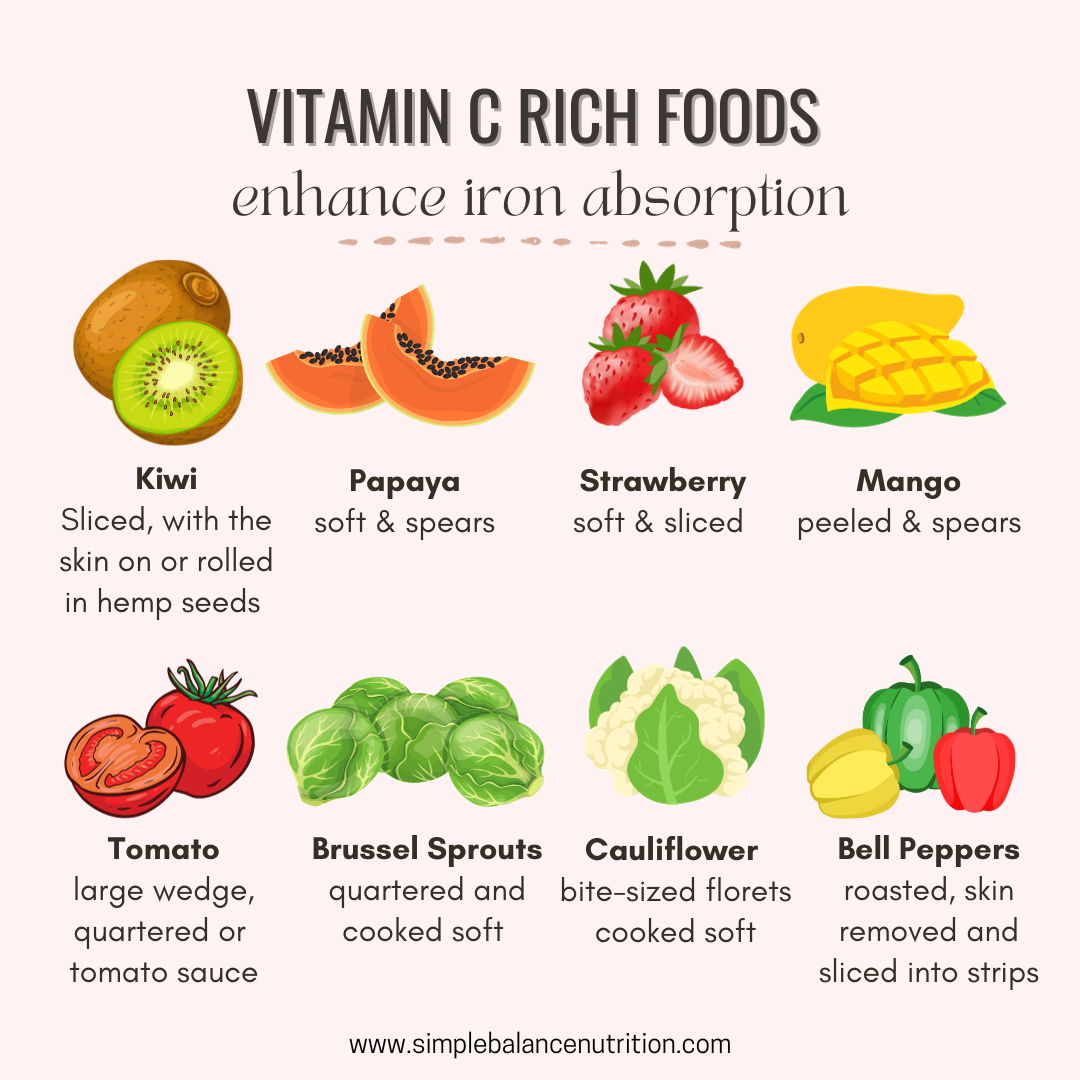
    Other good sources of vitamin C, including bell peppers, tomatoes, broccoli, citrus fruit and berries, etc. Ground meat in a tomato-based sauce forms an ideal combination.

  5. Cook with cast iron cookware. Cooking with cast-iron pots and pans safely introduces additional iron to the prepared dishes. If you don’t have one, you can try a product called the Lucky Iron Fish®. This is a simple, reusable and effective cooking tool that adds extra iron to your daily foods, soups or drinks. It is an affordable solution, especially for those with iron deficiency anemia.
  6. Cook with garlic or onion. Preparing meals with allium-containing ingredients (such as garlic and onions) can help increase iron absorption.

BOTTOM LINE 

Regardless of which feeding approach you choose, it is recommended to introduce iron-rich foods at around 6 months of age depending on their developmental readiness for trying solid foods.
A baby following the baby led weaning approach can indeed obtain sufficient iron intake, by offering a variety of iron-rich food sources.

For more help with baby led weaning and how to help you baby succeed with eating, be sure to check out my 3 months TRANSFORM program

Know the Difference between Gagging and Choking When Starting Solids

Know The Difference Between Gagging and Choking When Starting Solids

Many parents are terrified of feeding their baby beyond purees or finger foods.

“Is there a risk of my baby choking if I introduce finger food?”

“What is the difference between gagging and choking?”

“How to prevent my child from choking?”

“What should I do if my baby starts choking or gagging?”

“How can I overcome my intense fear of choking when feeding my baby?”

DOES BLW INCREASE THE RISK OF CHOKING? (WHAT THE RESEARCH SAY)

A 2021 review study quoted: “Fear of choking was an important factor in parents’ decision not to implement BLW; however, this fear was not supported by the literature.”

Today, I will provide a breakdown of two studies that have examined the risk of choking associated with Baby Led Weaning as a method for introducing solids.

THE BLISS STUDY

BLISS stands for “Baby-Led Introduction to Starting Solids”. This clinical trial on choking was published in the “Pediatrics” journal and titled “A Baby-led Approach to Eating Solids and Risk of Choking” This study included 206 families.

During the study, parents completed questionnaires at 6, 7, 8, 9, and 12 months of age regarding their baby’s choking and gagging experiences. Additional follow-up questions were asked to parents who reported incidents of choking to gather information about the type of food consumed and how the choking was resolved.

The findings revealed that approximately 35% of babies experienced at least one episode of choking between the ages of 6 and 8 months. There was no significant difference in the incidence of choking between the two groups at any of the assessed time periods.

However, it was observed that babies who started with Baby Led Weaning initially experienced more frequent gagging at 6 months, which decreased by the time they reached 8 months. On the other hand, babies in the puree group exhibited an increase in gagging incidents by 8 months, likely due to their progression to consuming finger foods. It is important to note that the gagging stage is a normal part of learning to eat and cannot be entirely avoided.

Regarding cases where medical assistance was required due to choking, two babies choked on milk, while one choked on food that was placed in their mouth by a caregiver (it is not recommended with Baby Led Weaning). This highlights the fact that choking can occur with any type of food or substance.

Furthermore, the researchers discovered that both groups frequently offered choking hazards to their babies, and not all parents closely supervised their babies during feeding.

ANOTHER STUDY PUBLISHED BY Dr. Amy Brown

This observational study was titled “No difference in self-reported frequency of choking between infants introduced to solid foods using a baby-led weaning or traditional spoon-feeding approach.

The survey also inquired about instances of choking experienced by the babies, including the frequency and the type of food involved (smooth puree, lumpy puree, or finger food).

The results indicated that 13.6% of the babies (155 out of the 1151) had experienced choking incidents. However, no significant correlation was found between the chosen method of introduction (BLW or traditional) or the frequency of spoon-feeding purees and the occurrence of choking.

It is noteworthy that among the babies who experienced choking, those following a traditional weaning approach had a higher number of choking episodes associated with finger foods and lumpy purees compared to babies following either strict or loose BLW.

This observation raises potential hypotheses: BLW mothers might exhibit lower anxiety levels, leading to less overinterpretation of choking incidents or excessive assistance during feeding, which can pose risks. Alternatively, the higher incidents of choking among traditional weaning babies could be attributed to their lower exposure to finger foods in the early stages, resulting in less practice when the gag reflex is more sensitive. This finding emphasizes the importance of introducing finger foods from the beginning, regardless of whether purees are included in the feeding approach.

Overall, based on the research, it suggests that the potential risk associated with BLW is not significantly higher compared to a traditional approach when initiating solid foods.

IS MIXED FEEDING SAFE?

Both Health Canada and the National Health Services (NHS) in the UK actually recommend a combination approach when introducing solids, which includes offering both finger foods and purees right from the start.

Despite some adamant claims made by Baby-led Weaning Facebook groups suggesting that this method increases the risk of choking, both research findings and personal experiences from my clients and my own child have not supported this belief.

Therefore, if you choose to incorporate both pureed foods and finger foods into your baby’s diet, there is no need to strictly adhere to the label of “Baby-led Weaning.” The important thing is to follow responsive feeding practices when spoon-feeding purees, being attentive to your baby’s hunger and fullness cues to avoid overfeeding. Additionally, make sure to offer finger foods during each meal to provide opportunities for your baby to practice self-feeding.

Ultimately, what matters most is following a feeding approach that suits your baby’s needs and abilities, regardless of the specific labels or guidelines, while prioritizing their safety and nutritional needs.

GAGGING

WHAT IS GAGGING?

Gagging is a natural reflex that helps prevent choking by stopping us from swallowing. It’s a normal and important part of learning to eat solid foods for babies. Gagging brings the food up to chew more before it goes back down, ensuring that only well-chewed food reaches the back of the throat to be swallowed.

Gag reflex effectively keeps larger food pieces near the front of the mouth, only allowing very well-chewed foods to the back to be swallowed.

During the initial stages of introducing solid foods, your baby’s gag reflex is positioned at the front one-third of their tongue. However, as they gain experience and exposure to different solid foods, the reflex gradually shifts further back. Eventually, it settles at the top of the throat, where the gag reflex is typically located in most adults.

WHAT TO DO IF YOUR BABY IS GAGGING

If your baby is gagging, avoid patting their back or attempting to stick your fingers in your baby’s mouth to remove the food, as this could cause the food to move deeper and potentially result in choking. Instead, demonstrate coughing the food up and spitting it out. Remember to stay calm and relaxed, as your reaction can influence your baby’s response to gagging and make the eating experience less enjoyable for them.

Never interfere! Allowing your baby to stay in control and figure it out on his own.

HOW TO PREVENT GAGGING

To help prevent gagging, there isn’t much you can do during your baby’s mealtime. However, you can start preparing them for learning how to eat by bringing them to the table around 5 months of age. Offer them a “hard munchable” item to chew on, such as a rib bone, celery, or a raw carrot. Although they won’t actually consume it, this will make your baby feel included in the family meal and increase their awareness of their mouth and how it functions. It can also strengthen their mouth muscles and potentially reduce a highly sensitive gag reflex.

WHEN TO GET HELP FOR GAGGING

If your baby continues to gag with every bite after a few weeks of introducing solid foods, it may be necessary to seek assistance from an Occupational Therapist or Speech-Language Pathologist.

Occasionally, babies may gag to the point of vomiting, which is also relatively common. To minimize this, try spacing out milk feedings from solids to ensure their stomach is not overly full during mealtime. This can reduce the likelihood of vomiting and prevent significant calorie loss.

If your baby consistently gags and vomits when eating solids exclusively, it might be beneficial to take a break from introducing solids for now. Your baby may not be quite ready, so waiting until they reach six months of age and then trying again could be a good approach.

For babies older than six months, consider offering purees for a week or two before reintroducing finger foods. While babies can still gag on purees, it might be easier for them to manage initially. Remember, it’s important to follow a baby-led approach if it aligns with your preferences and situation.

CHOKING

WHAT IS CHOKING?

Choking occurs when food accidentally enters the airway instead of the esophagus (food pipe).

During choking, a baby will not make much noise or may be completely silent as their air pipe becomes blocked. It is important to remember that loud gagging noises can be a positive sign in such situations.

When a baby is unable to obtain oxygen due to choking, their breathing is compromised, and their lips and face may turn blue.

IS CHOKING NORMAL FOR BABY LED WEANING

Fortunately, choking is significantly less common than gagging.

When reviewing the research, it is worth noting that approximately 13%-35% of babies in these studies were reported to have experienced choking at least once. Personally, I consider myself fortunate as I never had this experience with any of my children.

WHAT TO DO IF BABY CHOKES?

Choking is much more serious than gagging, and requires immediate intervention.

If there is another adult or older child present, quickly shout for their help and instruct them to call ambulance. In the absence of someone else, immediately make the call yourself while initiating infant CPR. Taking an infant first aid course can provide you with the knowledge and skills to handle such situations with confidence, even though the chances of it happening are unlikely.

KNOW THE DIFFERENCE BETWEEN CHOKING AND GAGGING

GAGGING 

Loud and red = gagging, let baby work it out

  • Face may turn bright red
  • Tongue will thrust forward
  • Making gagging noises
  • Sputtering coughing
  • No life threatening

It is advisable to avoid overreacting when your baby experiences gagging during mealtimes, as this may create fear and increase stress for both you and your baby. It is recommended to allow your baby a moment to handle the gag reflex independently without any intervention from you.

CHOKING

Silent and blue = choking, baby needs your help immediately

  • Face will start to go blue
  • Unable to make noise
  • May attempt to cough
  • Loss of consciousness
  • Can be life threatening

Choking occurs when food passes beyond the gag reflex and obstructs your baby’s airway, leading to either partial or complete blockage. This can result in a significant reduction or complete cessation of oxygen reaching the lungs, making it difficult for your baby to breathe. Choking is a severe situation that demands IMMEDIATE intervention, and if your baby is choking, it is crucial to promptly initiate infant CPR.

CHOKING HAZARDS 

It is important to note that BLW does carry a potential risk of choking compared to offering purees, especially when certain types of foods are introduced. Choking incidents occur when the airway becomes obstructed, which can happen if a baby bites off a piece of hard food that perfectly blocks the air passage. Therefore, careful attention must be given to the size and texture of foods offered during BLW. It is crucial to closely supervise your baby during mealtime and consider taking an infant CPR course as a precautionary measure.

HERE’S A FULL LIST OF POTENTIAL CHOKING HAZARDS

  • Raw hard vegetables (carrots or beets)
  • Raw leafy greens
  • Fibrous and stringy foods (celery, pineapple, or asparagus)
  • Firm fruit with and without peels (apples)

  • Fruits with pits or seeds, that haven’t been removed (whole plum or peach)
  • Whole grapes
  • Whole blueberries
  • Whole cherry tomatoes
  • Dried fruits (raisins, dried apricots)
  • Chunks of firm meat (steak)
  • Fish with bones

  • Whole hotdogs or sausages
  • Cheese sticks

  • Whole nuts and seeds
  • Think globs of nut butter

  • Hard candies, mints, or cough drops
  • Gummy bears
  • Popcorn
  • Marshmallows
  • Hard chips or nachos
  • Chewing gum
  • Snacks with toothpicks or skewers

ALTERNATIVE WAYS OF SERVING:

  • Steam vegetables and fruit.
  • Peel and grate hard vegetables and fruit like carrots, apples, and zucchini.
  • Grate cheese.
  • Always remove pits and seeds from fruit.
  • Slice small and round foods into quarter lengthwise.
  • Thinly spread any nut or seed butter on toast.
  • Remove bones from fish or meat.
  • Serve fresh, frozen, or canned (rinsed) corn instead of popcorn.

Well it’s possible for your baby to choke on food (or toys/coins/may other objects), there is a lot you can do to prevent choking.

TIPS TO PREVENT CHOKING WITH BLW

  1. Ensure that your baby is developmentally ready for solids.
  2. Positioning: Make sure your baby is sitting upright during mealtime and avoid a reclining position. Provide proper support by using a high chair that keeps your baby well-supported. Using rolled-up towels if needed to ensure proper positioning, with the tray (or table) positioned between their nipples and belly button.
  3. Minimize distractions: Avoid having toys or the TV on during meals as it may distract your baby and increase the risk of choking. Also, discourage running around with food once baby starts walking.
  4. Supervise mealtime: Always watch your baby while they eat and avoid sitting them on your lap during meals. It is important to have a clear view of your baby’s face while they are eating to ensure their safety.
  5. Let them self-feed: Never put a piece of food into your baby’s mouth. If you put food into their mouth, it may immediately fall to the back, without baby having a chance to control it with their tounge and chew it. Let them feed themselves. Also, never attempt to fish food out of their mouth.
  6. Offer safe size of food: Avoid round items like raw hard pieces of vegetables and fruit. Instead, either grate them or slice them thinly. Whole grapes, blueberries, or cherry tomatoes should also be sliced lengthwise into quarters, so they are not a round shape.
  7. Offer soft foods: Test the foods to make sure you can mash them with gentle pressure from your thumb and forefinger. This is called the “squish test“. If the food is harder, make sure it’s in a safe shape (ex: grated or sliced thinly)
  8. Take an infant CPR course.

BOTTOM LINE

It’s very important for parents to recognise the difference between gagging and choking and the different ways each scenario should be treated.

Remember that gagging is a normal reaction that weaning babies have as their gag reflex is triggered while learning to eat. Choking is when their airway gets blocked, and requires immediate first aid and medical attention.

Hope this was helpful. Please check out more about food textures, finger foods and choking on my IG highlights.

Did you know that we offer personalized nutrition counselling for kids and families? If this is something you’d like to learn more about, please visit here

Benefits of Introduction Solids with Baby Led Weaning

Benefits of Introducing Solids with Baby Led Weaning

Baby-led weaning (BLW) is an approach to introducing solid foods to babies that emphasizes self-feeding and allowing the baby to explore a variety of foods at their own pace. While BLW does offer several practical benefits, such as convenience and cost-effectiveness, there are also physiological reasons why it can be advantageous for your child. Here are some ways in which these benefits of baby led weaning can extend into your child’s lifetime:

INDEPENDENCE & AUTONOMY

BLW fosters independence and autonomy from an early age. By allowing babies to self-feed and choose what to eat, they gain a sense of control over their food choices. This empowerment can positively impact their self-esteem, decision-making skills, and confidence in their ability to make healthy food choices throughout their lives.

SELF-REGULATION & PORTION CONTROL

One of the key principles of BLW is allowing babies to control their own food intake. By offering a variety of nutritious foods in appropriate sizes and shapes, babies learn to recognize their hunger and fullness cues, promoting self-regulation of food intake. This self-regulation can help prevent overeating or undereating. It sets the stage for portion control and can reduce the risk of developing unhealthy eating patterns or weight-related issues as they grow older.

MOTOR DEVELOPMENT

BLW encourages the development of fine motor skills, hand-eye coordination, and chewing abilities. By allowing babies to handle food and feed themselves, they have the opportunity to practice and refine their motor skills, including grasping, picking up small pieces of food, and bringing it to their mouths. This can contribute to their overall motor development.

SENSORY EXPLORATION 

BLW exposes babies to a variety of textures, flavors, and smells from a wide range of foods. This early sensory exposure can help in developing their taste preferences, expanding their palate, and promoting a positive relationship with food. Research suggests that babies who experience a variety of flavors during weaning are less likely to develop texture aversions or picky eating behaviors later in life.

ORAL DEVELOPMENT 

The process of chewing and self-feeding during BLW stimulates the muscles involved in oral development. It encourages the baby to move their tongue and jaw, promoting the development of oral motor skills necessary for speech and swallowing. BLW can also contribute to the strengthening of jaw muscles, which may aid in preventing issues such as oral aversions or delayed speech development.

FAMILY MEALTIME DYNAMICS

BLW promotes the inclusion of infants in family mealtimes from the start. This practice creates a foundation for regular family meals, which have been associated with numerous benefits. Eating meals together as a family encourages communication, bonding, and social interaction. It also provides an opportunity for parents to role model healthy eating behaviors, table manners, and conversation skills. These positive mealtime habits established during BLW can carry over into adulthood, fostering healthier eating patterns and stronger family connections.

OTHER BENEFITS OF BABY LED WEANING BASED ON MY PERSONAL EXPERIENCES 

TIME & MONEY SAVING 

As a parent practicing BLW, I have experienced firsthand the practical benefits it offers. By allowing my twins to self-feed with appropriately-sized pieces of our family meals, I have saved time that would have been spent making or buying separate baby food. This has not only made meal preparation more convenient but has also resulted in reduced stress levels for me, as I can focus on enjoying mealtime and fostering a positive relationship with food for my twins, without the pressure of spoon-feeding or monitoring exact amounts consumed.

STRESS-FREE

With this approach, I found myself less concerned about my baby’s weight and felt less inclined to apply pressure or restrictions during feeding. This allowed for a more enjoyable and relaxed mealtime experience. Moreover, I noticed that my twins displayed a remarkable openness to different flavors and textures. Additionally, the early exposure to a variety of flavors and textures helps expand their palate, promoting a willingness to try new foods.

BOTTOM LINE 

Indeed, the benefits of introducing solids through baby-led weaning can have long-lasting effects on your baby’s eating habits and overall well-being. However, it’s important to note that while BLW can have physiological benefits, it may not be suitable for every baby or family. It’s always recommended to consult with a pediatrician or a dietitian to determine if it’s appropriate for your baby based on their individual needs and development readiness.

Personally, as a dietitian, I loved baby-led weaning as a way to start solids and totally recommend it! Two years later I still see so many benefits of doing it. I’m happy to answer any questions you may have about baby-led weaning. Just leave them in the comments and I’ll respond!

Happy Feeding!

You might also interested in reading about Introducing Solids To Your Baby: Baby-Led Weaning Vs. Spoon Feeding.

The Ultimate Gift Guide For Babies And Toddlers

The Ultimate Gift Guide For Babies And Toddlers

If you are searching for fun, practical and educational food and eating-related gifts for children and parents, I hope you will enjoy this guide of my favorite feeding tools, books, and gadgets. I used most of them myself and those that I did not are definitely on my wish list.

BABY FEEDING GIFT ESSENTIALS 

A GOOD QUALITY HIGH CHAIR

If you’re getting ready to start solids, or even if you’ve already started and looking for a comfortable, ergonomic and easy to clean high chair for your baby, here is my top 3 recommendations:

1. STOKKE TRIPP TRAPP HIGH CHAIR

The Stokke Tripp Trapp is a high quality wooden chair with an adjustable footrest. It is made to grow with your baby so they can continue to use it into toddlerhood and beyond. Be sure to purchase the Tray and Baby Set for feeding infants 6 -18 months.


2. NOMI HIGH CHAIR

The Nomi High Chair is a modern upgrade to the Tripp Trapp. It is light and easy to move or hang on the table for clean-up. The adjustable footrest and seat do not require tools.

You can get 10% off Nomi High Chair with the code YETING: click here to shop.


3. IKEA ANTILOP HIGH CHAIR

Another budget friendly high chair. For most babies, the seat is very big and can have a large gap between the baby’s chest and the tray, which means baby will have to lean over to reach for foods. I suggest buying the ANTILOP support cushion that’s sold separately to help fix this issue. This high chair doesn’t have a footrest, so what I suggest is buying a footrest to solve this problem too!


EZPZ FIRST FOODS SET

This set consists of 1 EZPZ Tiny Bowl, 1 Tiny Cup and a 2-pack of the Tiny Spoons. This set contains everything you need to get a safe start to solid foods.

Singapore:You can get 10% off with the code YETING: click here to shop.

Malaysia:You can get 10% off with the code YETING: click here to shop.


EZPZ TINY SPOON TWIN-PACK

Longer-handled spoons are useful when baby is being fed by a parent or caregiver, but for self-feeding babies, shorter handles, wider handles or handles with guards are better. EZPZ Tiny Spoon is designed to help baby learn how to feed independently. Adult-size spoons are too large for a baby’s mouth, so these tiny spoons have narrow spoon bowls that will help with portion control and prevent overfeeding and gagging. It actually works for both purees and the baby-led weaning feeding methods, therefore you’ll need to invest in at least two or three baby spoons for feeding.

Singapore:You can get 10% off with the code YETING: click here to shop.

Malaysia:You can get 10% off with the code YETING: click here to shop.


NUM NUM PRE-SPOON GOOtensils

When babies are just learning to handle a spoon, the food tends to slide right off. These spoons are great for “grabbing” the puree during self-feeding (or baby led weaning).

Singapore:You can get 10% off with the code YETING: click here to shop.

Malaysia:You can get 10% off with the code YETING: click here to shop.


GRABEASE BABY FORK & SPOON SET

These utensils feature short easy to grab handles that make it impossible for your little one to stick too far into their mouth. Additionally, the ergonomically shaped handles are easier for tiny hands to grab. When first starting I like to help them practicing poking and then showing them how they can bring the food to their mouth. This is a great first set, but don’t expect your baby to be proficient until closer to 12+ months.


SUCTION PLATES & BOWLS

When introducing solid foods to your baby, messy mealtimes are common. Suction bowls and plates help minimize the mess, so be sure to select baby bowls and plates with great suction.

1. OXO TOT STICK & STAY SUCTION BOWL

This bowl is made of BPA-free plastic so they are unbreakable. This bowl features a secure suction base that sticks firmly to surfaces, so can prevent accidental tipping to help prevent spills. The curved walls are designed to promote self-feeding skill such as scooping.


2. MARCUS & MARCUS SUCTION BOWL WITH LID

I also purchased some silicone bowls with lids because I’m constantly putting a bowl of half eaten yogurt or rice in the fridge for later.


3. AVANCHY BAMBOO SUCTION BABY BOWL + SPOON

If you’re looking for a bamboo option, which is a safe choice too, this is a great option. It comes with one of my favorite baby spoons and has a silicone suction base, which detaches for easy cleaning.


CUP

You might be surprised to learn that babies can start using an open cup as early as 6 months. All three of these cups are excellent options or teaching babies to drink from an open and/or straw cup during infancy.

1. EZPZ TINY OPEN CUP

EZPZ Tiny Cup is only 2 oz, perfect for little hands and the angle of the cup helps to control the flow as babies learn to use open cups. Additionally, the weighted base makes it harder to tip over. This tiny cup is made of food grade silicone, so great for teething. This cup doesn’t seal, so it’s not the best for an on-the-go life.

Singapore:You can get 10% off with the code YETING: click here to shop.

Malaysia:You can get 10% off with the code YETINGclick here to shop.


2. EZPZ MINI CUP + STRAW TRAINING SYSTEM

This cup is super versatile as you can also use it as an open cup. It’s 4oz so it would be perfect size for toddlers learning to drink from straws as most straw cups are much larger than this.

Singapore:You can get 10% off with the code YETING: click here to shop.

Malaysia:You can get 10% off with the code YETING: click here to shop.


3. Weighted Straw Cup

This straw cup is perfect for younger babies learning how to drink out of straw cup. They don’t spill and I love that they have handles. The weight at the bottom can keep the straw pointing down into the liquid which means your baby can drink at almost any angle.

Grosmimi PPSU Weighted Straw Cup & Munchkin Click-Lock Weighted Straw Cup are both of my favourite.


BAPRON BABY

A bib is an ESSENTIAL accessory for any baby or toddler, whether you are doing baby led weaning or not.

I have tried so many different styles and my favorites are definitely the ones that are easiest to clean.

  • Bapron bib is made from a waterproof fabric that is super soft, made from an eco-friendly type of polyester. You can rinse the Bapron bibs in the sink right after meals, dry them on the drainboard and they’re ready to go for the next meal.
  • Sleeveless so they don’t weigh your baby down or restrict their range of motion.
  • If your baby doesn’t tolerate a bib, tie-on ones are harder to yank off than velcro ones. Bapron baby bibs tie in the back under your baby’s shoulder blades – not all up in their neck which can be a negative sensory experience.

Singapore:You can get 10% off with the code YETING: click here to shop.

Malaysia:You can get 10% off with the code YETING: click here to shop.


SPLASH MAT

Eating solids is a dirty business, both spoon-feeding or baby led weaning. A waterproof  mat to go under your baby’s highchair makes for easy cleaning. The Bapron Splash Mats are made from the same amazing fabric as their bibs. You can rinse them under water and dry in between feeding.

These mats are also perfect for indoor/outdoor picnic, crafts and sensory play, if you’re out and about and they fold down so small you can easily transport them in your diaper bag.

Singapore:You can get 10% off with the code YETING: click here to shop.


TOOTH BRUSH

The Nuk™ Brush is a toothbrush-like teether with a nubby textured silicone “brush” at the end. Perfect shape and size for little mouthes. Initially, this brush was designed for teething infants, it has made its way into therapeutic settings as an invaluable tool for oral massage, oral stimulation and sensory exploration. So it is usually used in speech therapy and feeding therapy to help with oral motor skills and to de-sensitize the gag reflex.

The Nuk™ Brush can be perfect tool if you have a child who is struggling with certain food textures or gagging and spitting the food up.


BOOKS

Children deserve to learn about good nutrition and develop positive attitudes about eating. These 3 books that teach nutrition are perfect to get you started!

1. LULU’S LUNCH BY CAMILA REID & AILIE BUSBY


2. EATING THE ALPHABET BY LOIS EHLERT


3. THE VERY HUNGRY CATERPILLAR BY ERIC CARLE

TODDLER FEEDING GIFT ESSENTIALS

1. EZPZ MINI FEEDING SET

If your baby is ready to move to the table (without a tray), a suction plate can be helpful. They are also great to bring to restaurants or in-laws for your baby to eat off of. Also, if your baby or toddler does not like his food to touch, this divided plate is a perfect choice. The built-in separators help keep the servings small and make it easier for parents to offer a variety of foods like puree and finger foods each meal. This set consists of 1 EZPZ Mini Mat, 1 Mini Spoon and 1 Mini Fork.

Singapore:You can get 10% off with the code YETING: click here to shop.

Malaysia:You can get 10% off with the code YETINGclick here to shop.


2. UTENSIL SET

This OXO TOT Fork & Spoon Set is easy for young eaters to learn self-feeding. A flat spot on the handles prevents the fork and spoon from rolling off the table or high chair tray, and the soft grips are shaped to keep them from sliding into bowls or plates. The depth of the spoon is ideal for scooping up food. The stainless steel body is extremely durable.


3. LEARNING CHOPSTICKS

Marcus & Marcus Learning Chopsticks is one design that fits both right-handed and left-handed toddlers. They are so easy to use and toddlers can learn using the chopsticks in a day! The rings support them to hold onto the chopsticks and they can be adjusted to a comfortable angle for perfect fitting on each individual hand.


4. SNACK CUP

This is perfect for on-the-go snack and great for keeping snacks from spilling, such as cereal.

Malaysia:You can get 10% off with the code YETINGclick here to shop.


5. LUNCH BOX

Choosing a lunch box can be overwhelming as there are many different varieties, styles and sizes of lunch boxes to choose from, not to mention different materials. We all want to pick a non-toxic lunch box that won’t harm our children, while also making sure it’s easy to clean!

To narrow down your list, here are the things that I believe we should look out for:

  1. BPA-Free – The lunch box should be safe to store food inside.
  2. Stay Fresh – A box that will seal and keep an unwrapped item fresh.
  3. Easy to Clean – I prefer one lid for the lunch box, easy to clean and store when drying.
  4. Sections – Separate spaces to place different foods.
  5. Size – It’s not too big to fit into the child’s school bag, or take up most of the space.
  6. Perfect Portions – Sections that are big enough for the amount of food the child will eat.
  7. Reusable – Save the environment and your pocket, don’t use plastic zip lock bags.
  8. Dishwasher safe – For those days I don’t have time to hand wash.
  9. Easy to store – not too bulky to store when not in use.
  10. Machine Washable – lunch bags can easily be washed in the washing machine.

I personally prefer lunch boxes that seal tight and keep an unwrapped food fresh, eliminating the use of plastic wrap or sandwich bag which saves money and the environment. Also, most children prefer to graze on a variety of foods as opposed to just a sandwich and piece of fruit and so the bento style boxes and accessories are very clever at making the food fun and exciting.

My son has been using YumBox since he was threeIt is designed for easy to open, and 100% leak proof – perfect for on-the-go or school lunch or snack!

Another favourite lunch box is from local Malasyia’s brand Wild Mums Enterprise.

Malaysia: Check out Wild Mums Enterprise for Mumu M3: 3-Compartments Detachable Lunch Box and Mumu M3: 3-Compartments Lunch Box.

6. SENSORY FUN FOOD PLAY GUIDE

If you think your child can benefit from Sensory Food Play to help with their eating, check out Sensory Fun Food Play E-book. It has over 100 activities I created with a focus on picky eaters. Join me for lots of fun sensory food play.


7. BOOKS FOR PICKY EATERS 

Looking for a great book to help your picky eater? One of the ways you can help your picky eater as a parent is to talk about food at times other than mealtime when things are a bit more mellow and no one is furstrated or hangry. Check out some of my favorite books for picky eaters that help teach confidence, get them excited about trying new foods.

1. I WILL NEVER NOT EVER EAT A TOMATO BY LAUREN CHILD


2. DAISY EAT YOUR PEAS BY KES GRAY


3. BURGER BOY BY ALAN DURANT

MY FAVORITE GIFT FOR NEW PARENTS 

1. PEACEFUL MEALTIMES ONLINE COURSE

Feeding is one of those milestones that gives parents a lot of stress. That’s why I offer my online course as gifts! I designed this online course to help parents go from feeling overwhelmed and nervous about picky eating and meeting nutrient needs, to feeling confident, calm, and knowledgeable about their children eating independently. BUY THE COURSE AS GIFT NOW.


2. FIRST AID & CPR COURSE

Although choking is a very rare risk it is also a very real risk. Knowing basic CPR skills can save your baby’s life and I suggest that everyone (partner, husband, mother-in-law, babysitter…) who helps or is going to help feed your baby should know CPR.

My go-to 2 days First Aid & CPR Training course from @YS First Aid is on now open for register!

If you want to focus on Infant/Child CPR, Choking and Injury Prevention Course, you can check out  @Little Beh’s 急救课.

YS First Aid: ysfirstaid6@gmail.com, 019-689-3413

Little Beh’s 急救课: jbmacademyplt@gmail.com, 016-206-8643


3. CERAMIC COOKWARE

Color King 100% Ceramic Cookware (Non-Toxic , No PTFE, No PFOA) is one of the best investments you can make. It will drastically improve your cooking experience and make your meals taste better. It performs well in a range of temperatures from -20°C to 400°C. It works great on gas and electric stoves as well as with ovens. Also, it has excellent heat retention that can preserve the flavor and nutrients of your dishes.

Check out their Facebook Page or contact their customer service representatives for any questions you have at 018-277-7802. 


4. CRINKLE CUTTER

This is another tool that I am getting lots of questions about. Some people call it a crinkle cutter because it makes fun grooves on the food.

If you are doing baby led weaning, it doubled as a finger food cutter, because the grooves it makes on food make it easier for small hands to grab and hold it, especially if it is slippery. Some examples of finger foods I created using this crinkle cutter: mango, avocado, kiwi, pineapple, very ripe pear, steamed carrots and apples sticks and slices.

Singapore: You can get 10% off  YAY Crinkies with the code YETING: click here to shop.


5. SPIRALIZER

My son love helping me spiralize fruit and veggies into fun shapes and it saves a lot of time spent chopping and slicing. We spiralize raw fruit just for fun and to use in salads and roast spiraled root veggies like sweet potato and beets. Raw spiraled zucchini, carrots, and jicama work great in salads.

Malaysia: Check out the Spiralizer here


6. MINI COOKIE & VEGETABLE CUTTER

These little tools are my hard-working kitchen helpers. From cookies to veggies and from fruit to sandwiches, they cut everything into super cute shapes that my children love. This newer option comes with silicone holders which makes them even more child-friendly.


7. LUCKY IRON FISH

The Lucky Iron Fish is a simple and effective cooking tool that is designed to add natural iron to any liquid-based meals. It’s easy: simply drop Lucky Iron Fish into boiling water or liquid-based meals for 10 minutes to release a portion of your daily recommended iron. Great for postpartum moms who are struggling with iron deficiency anemia.


8. POPSICLE MOLD

This popsicle mold puts a fun and creative way to eat a nutritious snack. You can freeze pretty much anything in them, from breastmilk to smoothies. I always use the molds to freeze the leftovers smoothie. No waste and a yummy snack always on hand.


9. BOOKS FOR NEW PARENTS

Are you looking for books and resources on nutrition, feeding children, picky eating and baby led weaning?  I wanted to share my favourite child health and nutrition books with you.

1. Child of Mine by Ellyn Satter

The Gold Standard reference for building trust in feeding children and establishing positive feeding, using the Division of Responsibility. A must-read for all new parents.


2. Helping Your Child with Extreme Picky Eating: A Step-by-Step Guide for Overcoming Selective Eating, Food Aversion and Feeding Disorders by Katja Rowell and Jenny McGlothlin

Family doctor specializing in childhood feeding, Katja Rowell, joins forces with speech pathologist, Jenny McGlothlin, to help support children with food aversion and end meal-time anxiety (for your child and you) once and for all.


3. Baby-Led Weaning: The Essential Guide―How to Introduce Solid Foods and Help Your Baby to Grow Up a Happy and Confident Eater by Gill Rapley Ph.D. and Tracey Murkett

Still not sure if BLW is for you? Let Gill Rapley, the generally acknowledged pioneer of baby-led weaning, walk you through this approach.

If you want to understand the history and theory behind baby-led weaning, this could be the one for you. The book goes into the essentials and basic principles of why the method works. It also explains in detail the benefits your little one can get by following baby-led weaning.

The book uses an easy and clear tone. Its claims are backed with science-based facts. The topics are clearly divided, so you can skip forward or just choose a topic you like.

The updated edition includes the latest research on allergy prevention and safety. This thick, big book can be a good reference or a go-to book for your BLW questions.


10. COOKBOOKS FOR BUSY PARENTS 

Whether you have a new eater, picky eater or extremely picky eater, there are steps you can take to make trying new food fun, enjoyable and pressure-free. I have some cookbooks to keep you excited about planning your baby’s weaning meals.

1. The Baby-Led Weaning Cookbook: Delicious Recipes that’ll Help Your Baby Learn to Eat Solid Foods―and That the Whole Family Will Enjoy by Gill Rapley PhD, Tracey Murkett

Gill Rapley’s Baby-Led Weaning Cookbook is more than just a cookbook. Before getting to the recipes, you will also be given a comprehensive guide on baby-led weaning.

It’s like a summary of Rapley’s Essential Guide to remind you what to consider while preparing meals. The book details the importance of baby nutrition and safety.

Recipes are made not just for the baby but also for the rest of the family. The book provides a huge range of recipe ideas. It offers simple meals and healthy and nutritious store-cupboard meals to new recipes.

With more than 130 recipes, there’s always something for everyone. Even your family’s picky eaters can find something they might enjoy. This big book has plenty of meal plans from baby snacks, healthy sweets, and filling meals for the family.

There are stories and messages from parents who practice baby-led weaning to keep readers inspired. There are also easy-to-follow tips on minimizing the mess during the baby’s feeding time.


2. Recipes to Boost Immunity / Pre-Pregnancy Meal Plans

Two cookbooks with over 100 recipes which are family-friendly to ensure nutritious meals for all.


HAPPY SHOPPING!

That’s all for my 2023 gift guide! All of these products are great for baby led weaning and into toddlerhood. Truly an ultimate guide for Holiday or Birthday shopping for your baby, toddler, and any new parents in your life.

Disclaimer: Please note that all opinions are my own and I was not paid to promote any of these products. The post contains affiliate links that allow me to receive a small commission to help run this blog. Thank you for your support and understanding!

sensory-fun-food-play-photo

What You Should Know About Sensory Food Play

Sensory food play is an extremely hands-on activity, which lets children engage with their senses through the exploration of different foods and textures through play. When sensory play is focused on food, it becomes even more stimulating   a b   se food is the ultimate sensory experience.

I know FOOD PLAY is usually not considered a good thing by parents as it is messy, but it is important for them to explore the foods through play.

Sensory food play is not just about playing foods      

WHY?

In a study published in Public Health Nutrition, researchers from Finland describe “sensory-based food education” programs that are common in preschools there. The programs include activities like preparing salads, growing vegetables in a garden or on a windowsill, taking field trips to pick berries, and participating in “sensory sessions” where children touch, listen, taste, and smell different kinds of foods—then share observations with each other.

They found that preschoolers who participated in this food education chose more fruits and vegetables from a buffet compared to those who didn’t receive it. Researchers say this sensory-based education helps children explore food with all five senses and instills a joy of eating. They also note that the findings held true even if there was a high level of pickiness in the group—which shows that “positive peer modeling” can also encourage children to try new foods.

  • Explore: When we let children explore and play with food, it gives them an opportunity to get to know their food and become comfortable with how it will eventually feel in their mouths.
  • Stress-free: Some children are anxious about unfamiliar foods, and Sensory Food Play provides them with some much-needed relaxation when faced with the overwhelming sensory experience of a new food. Smashing, squishing, poking, rolling, pouring, and dumping the food can provide stress relief as well as teach them how that food might feel in their mouth (and they just might try it!).
  • Build Trust: The use of Sensory Food Play can assist the child with touching, smelling and playing with the texture in an environment with little expectation. As the child develops trust and understanding of this texture it helps build positive pathways in the brain to say it is safe to engage with this food.

SENSORY FOOD PLAY RULES:

You can set a time and place for playing with food. You can also set the rules and boundaries for this exploration process. If you are worried about the mess or expense,  make a rule about that.

  • Mess: You can help your children manage their mess with consistent directions and rules. Before you get started, make sure that you have decided where your children are going to be playing. If it is going to be on the floor, put down a splash mat, old shower curtain or blanket. You could also play in the car porch to avoid lots of mess (handy for a rinse over afterwards!). I love to put the infant (6 months+, support with cushion) in highchair and put the messy/food play activity on highchair table. Just remember, the goal is for your children to develop positive feelings and connections with their food, so let them have a little fun with it.
  • Clean up: Have a clean up bin ready, such as baby wipes, apron, sponge, paper towels, cleaning spray.
  • Expense: Most of my sensory food play items I buy in bulk (e.g., rice, pasta, beans, cereal, oatmeal, yogurt, food coloring, toothpicks, etc.), which saves money in the long run. I often buy canned food items (peas, pears, fruit cups, etc.) or use leftovers. Also, I use items I receive for free at fast food restaurants (ketchup packets, straws, and other dipping containers).

Sensory food play is so important and beneficial for babies and younger children.  Not only is it lots of fun, but there is a lot of learning going on when they are playing that you might not realise. I am going to should you some benefits when a child engages in sensory food play.

SENSORY FOOD PLAY SKILLS:

  • Sensory system (learning and developing new tastes, textures and smells)
  • Gross motor skills (body balancing)
  • Fine motor skills (scooping, pincer grasp, writing, dipping)
  • Mealtime skills (pouring, tasting)
  • Language skills (maths, food vocabulary , following directions)
  • Play skills (imaginary play, solitary play)
  • Social skills (turn taking, manners) with other children
  • Problem solving skills (How to..)
  • Brain development (enhancing memory, ability to complete more complex learning tasks)
  • Learning cause and effect (what happen after squishing blueberries)
  • Growing independence through play
  • Creativity and FUN
  • Exploring shapes and colours

Here are some fantastic ideas and activities for sensory food play:

Digging in Beans – Get ready to dig, lift, dump, and pour. Fill a pan with dried beans, noodles, or rice and get little trucks or cars out. My son was crazy about this one.

Yogurt Paint – Paint  with yogurt. Get your little one touch new veggies while making beautiful art.

Shape Matching – Simple, quick and easy.

Learning Letters – use yogurt to make a letter, and trace the letter with berries or pomegranates.

Stacking – make a tower or building.

Rainbow Toast – Painting on food you can eat!

Counting Game – an easy educational game you can create for your little one.

Food Ribbons – use a peeler to turn a fruit or vegetable into ribbons.

I recommend Sensory Food Play at least once a week at home for picky eaters or problem eaters. Playing with food away from table (without pressure to eat or eat it now) offers your child the opportunity to look at, touch, smell and hopefully tasting the foods.

Sensory food play is vital for a child’s development and learning process! After you discover the key benefits of sensory food play for children in my article today, you may want to initiate sensory food play at home.

DON’T KNOW HOW

If you have no idea, you can check out this SENSORY FUN FOOD PLAY GUIDE. This guide takes you step by step through how to set up food play at home and get your children engaged in more than 100 sensory food play activities. Don’t be afraid to be silly and creative!

Happy Playing!

CHECK OUT NOW

Salt:Sodium for Babies and Toddlers

Salt/Sodium for Babies and Toddlers

I feel like a lot of us, parents, are pretty conscious of how much sugar we’re giving to our little ones, but what about their salt intake, especially if you are doing mixed approach.

HOW MUCH SALT?

Due to insufficient data for babies, an AI (Adequate Intake) for sodium has been established.

  • For infants 6 months and younger, the AI for sodium is 110 milligrams per day (here).
  • Babies between the ages of 7 and 12 months have an AI of 370 milligrams per day (here).

So, up to 12 months of age, the recommended amount of sodium per day is less than 400 mg sodium. This includes salt found in breastmilk/formula AND solid foods. So, considering that breastmilk and formula have about 200 mg of sodium per 24 oz., this means that babies should only be consuming about 200 mg of sodium via solid food daily.

The reason for this recommended intake level is that we assume that babies’ kidneys are still very immature and won’t be able to process large amounts of salt properly. So far, we don’t have enough research yet to say that this is 100% the upper limit for salt for babies under 1 year old. They may be able to handle more, but without enough research indicating the highest level actually determined safe before developing any risk of poor health effects, sticking to this limit is advised.

SALT VS. SODIUM

Salt and sodium are often used interchangeably and you may see both on food labels. Table salt that we eat is actually made up of sodium (40%) and chloride (60%).

1 tsp salt = 2300 mg sodium 

1 g sodium = 2.5 g salt 

We definitely need both of these electrolytes (as well as potassium) as they help send messages along the nerves, enable muscles to contract,  balance the amount of fluids in the body, enhance nutrient absorption, regulate acid-base balance, absorb potassium, and control the level of bacteria present in the stomach.

SALT IN FOODS

Salt in pretty much everything store-bought, processed or packaged. It’s a preservative and it makes food taste amazing, so naturally food manufactures will put it in deliberately. Salt can be found in:

  • Processed meats like deli meats, bacon, hotdogs, ham and sausages.
  • Frozen foods like fish sticks, chicken nuggets, frozen meals.
  • Potato chips
  • Crackers
  • Canned soups
  • Gravy
  • Broths (vegetables, chicken, beef)
  • Olives, pickles, pickled vegetables (Kimchi)
  • Soy sauce

Other foods that you may not be aware as they don’t taste very salty but are very high in sodium:

  • Cheese and other dairy products like yogurt and milk
  • Bread, bagels, English muffins, tortillas, and other bread products
  • Canned tomato and pasta sauce
  • Canned vegetables
  • Canned beans
  • Box cereal

*Fresh Milk  – 100 mg sodium in 1 cup. The high sodium content is one of the many reasons milk is not recommended as a main drink until your baby turns one. A little milk in cereal or baked goods is ok, so no need to cut it out completely.

WHAT SHOULD YOU DO?

As you can see in the picture above, sodium is found naturally in foods as well as added to processed foods. It’s practically in every food. So do we need to completely eliminate salt from baby’s solid foods?

AT HOME

If you are cooking meals for your family, you can always hold off on adding salt until after you have taken out your baby’s portion. For example, when making a stir-fry, put a small portion aside before adding soy sauce to the pan.

It is important not to add salt to anything you cook from scratch, even if you think it tastes bland, taste can be different experience for your baby than it is for you. You can use herbs and spices as flavour enhancers.

During the first few months of eating, it is very unlikely that a baby will consume a large amount of sodium. Especially if you are being mindful in the purchased foods you provide. When baby’s don’t eat that much, it is just a hard proposition for them to get in a lot of sodium. And if a baby is self-feeding, it does take a while for them to start to ingest a decent amount of food!

For older baby, if we are sharing meals and eating more family-style meals, it is likely that you will need to pay a little closer attention to their foods as hidden sodium can be found in so many foods!

AT RESTAURANT

Restaurant foods tend to be much saltier than what you would make at home. It is also very hard to determine how much sodium is actually in a dish. Even if the nutritional information is published, many chefs will add salt as they see fit, regardless of the recipe. There are a couple of ways you can approach this. My general recommendation is not to worry too much. As long as you aren’t eating at a restaurant daily, or multiple times a day, it will all even out. Try to order something that would normally be cooked with less salt. You can even ask the waiter’s or chef’s suggestion.

If you have a baby that doesn’t eat that much yet, or in general, then you should be fine. If your baby usually eats a lot, there is always the option of bringing along some food for them that you know is low in sodium. I generally find that I can make do at restaurants with the food on the menu. I also want my child to experience the different flavors available. But if you’re unsure what is there, it never hurts to bring your own food along.

The key is being mindful and seeing how you can balance things in the next few days. Maybe one day they eat a good amount of cheese and bread, so the next day you are very conscious of only offering low or no sodium foods. Maybe one meal they eat at restaurant and the next meal you focus on fruit and a homemade muffin for snack. Pick and choose your battles and do what you can to make smart decisions wherever possible.

If it’s really only once or twice a week that you have restaurant meals, then just be sure to note that and adjust the food choices for the rest of the week! Keep it truly balanced while continually striving to plan ahead.

BOTTOM LINE

The idea is to do your best, serve homemade meals as much as possible. Read labels and practice mindfulness around what you’re eating and feeding your baby. This is a good practice to get into for the whole family.

What you feed your child today lays the foundation for taste preferences for tomorrow. 

adding-herbs-and-spices-to-baby-foods-photo

Adding Herbs and Spices to Baby Foods

Herbs and spices provide our foods with a multitude of flavours, fragrances, and colours. However, many parents worry about adding flavour this way to their babies’ food, believing that spices are hot and not suitable for little ones’ taste buds.

Baby food doesn’t have to be bland!

There is a big difference between hot spices and aromatic ones. Aromatic spices, such as turmeric, garlic, ginger, dill, cumin, nutmeg, garlic, dill, and cinnamon, are perfectly fine to introduce to baby after 6 months.

This guide explains why I recommend parents adding herbs and spices to baby’s food, the benefits of adding them and gives some ideas on how to start introducing them to your baby.

WHY YOU SHOULD INTRODUCE HERBS AND SPICES TO BABIES

If your baby doesn’t have any digestive problems, I always encourage parents who are just starting weaning their babies, either by purees or baby led weaning (around 6 months of age), to experiment with herbs and spices from the beginning. The more you expose your baby to a variety of tastes and flavours, between 6-12 months, the more likely it is that they’ll accept a variety of food later on in life! This means adding herbs and spices right from the beginning helps reduce the chances of pickiness.

In fact, breastfed babies are often introduced to a variety of spices even before starting solids. Breast milk can change its flavour, depending on a mum’s diet. If mum enjoys spicy and flavoursome food, then her baby will be exposed to this through her milk, helping create and develop a taste for flavoured foods. Therefore, by flavouring food with a variety of herbs and spices, you’ll continue the benefits of flavour exposure found in breastmilk.

What about exclusively formula fed babies? We know that babies are made to handle various flavours from the first day of their life, they were capable of experiencing various spices without any issues. So bland food is actually not a requirement for them and it’s natural for them to experience different flavours. If your baby is exclusively formula fed, then they wouldn’t have that exposure, and so beginning with some herbs and spices when they start solids is a great way to get those taste buds primed for new flavours.

As salt and sugar should be limited in baby food, spices and herbs are a great way to flavour food.

BENEFITS OF INTRODUCING HERBS AND SPICES AT AN EARLY AGE 

  • Trains the baby’s taste buds to enjoy variety flavors and will set the foundation for healthy eating habits.
  • Teaches the baby to expect change with food. Offering a plain mashed banana one day and a mashed banana with a dash of cinnamon the next can have a valuable influence on the child’s evolving palate.
  • Fresh herbs are packed with antioxidants, vitamins and minerals.
  • Herbs and spices are great flavour enhancers without adding unnecessary sugar and salt.
  • Helps babies transition to family food, as your baby will be familiar with those tastes and more likely to accept them.

WHAT ABOUT HOT SPICY FOODS?

Hot spicy foods (cayenne pepper or jalapeño) can hold off for a while. But, it is recommended to use aromatic spice first, such as curry, cumin, oregano, turmeric, cinnamon, mint, basil, allow them to experience those flavours first, before adding small amounts of hot spices. We live in Malaysia, the 3 major cultures that have influenced Malaysian food are Malay, Chinese and Indian. A lot of Malaysian dishes can be classified under the hot and spicy category. So, once you start, use mild spices in small dosages, therefore, you can cook a dish that the whole family can enjoy.

POPULAR FLAVOUR COMBINATIONS 

Here is a list of baby friendly herbs, spices and natural flavor enhancers and the foods that pair well with them:

Vegetables 

  • Asparagus: Parmesan cheese
  • Banana: rolled in unsweetened coconut
  • Broccoli: nutritional yeast
  • Butternut squash: cinnamon, nutmeg, allspice or ginger
  • Carrots: basil and garlic; or cinnamon
  • Cauliflower: curry powder
  • Green beans: garlic powder
  • Mashed potatoes: dill or garlic
  • Pumpkin: cinnamon, nutmeg, or ginger
  • Sweet potato: cardamom, cinnamon, cajun spice or nutmeg

Fruits 

  • Applesauce: cinnamon, nutmeg, allspice, or ginger
  • Avocado: cilantro or parsley
  • Bananas: cinnamon or allspice
  • Pears: ginger or cinnamon

Grains/Cereals

  • Oatmeal: cinnamon and nutmeg
  • Pasta: basil, oregano, or garlic
  • Rice: cinnamon, nutmeg, cardamom, or ginger
  • Quinoa (sweet): cinnamon, nutmeg, cardamon, or ginger
  • Quinoa (savory): garlic powder, pepper, onion powder, basil, or oregano

Dairy

  • Plain yogurt: cinnamon or mint

Meat 

  • Chicken: ginger; rosemary, sage and thyme; lemon zest and pepper; or basil and oregano; paprika
  • Beef: garlic and pepper; or onion powder and pepper
  • Salmon: dill, lime or lemon

TIPS TO ADD SPICES & HERBS TO BABY FOOD

When adding herbs and spices, make sure to start simple and try not to add too much so as to overpower the food. Start out by adding one herb or spice to your baby’s food and then building it up from there by mixing with other flavours.

  • Storage: Store spices in airtight containers away from light and heat. Whole spices will keep for around 1-2 years but after around six months, ground spices will start to lose their aroma and flavour. So buy in small amounts and use often!
  • Pre-mix spice blends: Always read the packaging when using pre-mix spice blends (as they often have added sugar and salt), try making your own blends.
  • Start slowly: Start with plain foods so baby can try the taste of the food on its own.
  • Use small amounts: Once baby has tasted the food plain, you can gradually add spices and herbs you use when cooking for the rest of the family. Use small amounts to start with to allow your baby to get used to different flavours. You don’t want to overpower the food. Start out by adding just a pinch.
  • Prepare fresh leafy herbs properly: Wash fresh herbs and then puree or finely mince before adding to baby food. Large leaves can be a choking hazard
  • Don’t give up: If your baby rejects the flavour of the spices/herbs just remember that it can take up to 10-20 exposures for a new flavour to be accepted.

Let’s give our babies something other than tasteless mush or finger foods to eat!  I’m a firm believer that babies deserve the tasty goodness we feed ourselves. When you implement these tips, you will create a change in taste and expectation for your baby. When babies learn to accept change with food, they become less likely to get stuck in food ruts.

If you’ve added herbs and spices to your baby food, what’s your little one’s favourite combinations?

why-shouldnt-babies-eat-honey-photo

Why Shouldn’t Babies Eat Honey?

The American Academy of Pediatrics (news) and the World Health Organization advises that honey should not be added to food, water, or formula that is fed to infants younger than 12 months of age. This technically, applies to raw and unpasteurized honey, local honey; even applies to all foods and baked goods containing honey.

Honey can contain spores of bacterium called Clostridium Botulinum, which can germinate in a baby’s immature digestive system and release the toxin that causes Infant Botulism – a potentially fatal illness.

Honey should never be given to a child under the age of 12 months old.

SIGNS AND SYMPTOMS OF INFANT WITH BOTULISM 

Symptoms typically appear within 12-36 hours after eating contaminated food, but may occur as early as a few hours and as late as 10 days.

  • muscle weakness
  • flat facial expression 
  • decreased movement 
  • lethargy in feeding or weak sucking
  • weak cry
  • constipation 

These are all a result of the muscle paralysis caused by bacterial toxin. If your infant has signs of botulism, it is recommended you visit the emergency room immediately as this is a life-threatening illness.  Be sure to keep samples of the potentially contaminated food for testing.

IS HONEY SAFE FOR TODDLERS, OLDER CHILDREN AND ADULTS? 

These spores are usually harmless to adults and children over age one. In adults, the amount of botulism spores ingested (if any) from honey is really quite negligible because we have mature intestines. The intestines of an adult contain enough acids to counteract the production of toxins the botulism bacteria produce. Once an infant reaches the age of 1 year or older, their immune system is well developed and intestines have a balance of acids that help destroy and fight off any toxins that the botulism bacteria produce. 

WHAT ABOUT FOODS CONTAINING HONEY?

Children under age 1 should not be offered any foods with honey, including yogurt with honey and cereals and crackers with honey, such as honey graham crackers, honey nut cheerios, honey wheat bread. Cooking and baking do not reach temperatures high enough to kill or destroy the botulism spores. 

Honey is unsafe in any form under one.

BOTTOM LINE

Honey contains modest amounts of B vitamins and vitamin C, it can be a nice addition to your baby’s diet, but it’s important to wait until after 12 months of age. Remember, honey, a sweetener, does have a lot of calories, just like other natural sugars. Read labels carefully to see if processed foods contain honey.

Did you know that I provide personalized nutrition consultation service for families? If this is something you’d like to learn more about, check out here