Cold Soba Noodles With Peanut Sauce

Cold Soba Noodles with Peanut Sauce

Soba noodle salad. Why not? Peanut sauce. Oh Yeah !

In the hot summer weather, nobody likes to turn on the oven. So I decided to make this meal so that everyone will enjoy chilled.

Peanut Sauce 

This recipe can be made ahead of time for meal prep, but I would recommend storing the peanut sauce with the noodles to keep them moist. You may want to make a double batch of sauce and drizzle a little extra over your meal every day for an extra burst of flavor.

Salad Bowl 

Carbohydrate: Soba noodles made from Buckwheat. You can usually find them in the Asian/Oriental section of most grocery stores, They keep well as leftovers but are more flavorful than traditional pasta, which makes them a great ingredient for a noodle salad bowl.

P/S: Not all Buckwheat Noodles are gluten free, so if you are GF, please be sure to read the ingredients before you purchase.

Veggies: You can load with crunchy veggies like purple cabbage, carrots, bell peppers, and cucumber.

Protein: If you’d like to add more plant based protein to this meal, feel free to add in some chopped tofu, tempeh, fried egg, or nuts.

Now that’s a meal!

Enjoy !

For more delicious, family friendly recipes, check out my Facebook Page and follow me on Instagram !

Cold Soba Noodles With Peanut Sauce

This cold Soba Noodles with Peanut Sauce is a filling vegetarian entree that is perfect for an on-the-go lunch or light dinner.
Prep Time 10 minutes
Cook Time 5 minutes
Total Time 15 minutes
Course Light dinner, Lunch
Servings 4 people

Ingredients
  

  • 6 ounces soba noodles

PEANUT SAUCE

  • 6 tbsp water (add more if too dry)
  • 1/2 cup natural peanut butter
  • 2 tbsp reduced sodium soy sauce
  • 1 tbsp rice vinegar
  • 1/2 tbsp ginger grated
  • 1 tbsp sirracha sauce

FOR THE BOWL

  • Thinly sliced assorted veggies (I used carrots, bell peppers, cucumber)
  • Lemon wedges
  • Chopped peanuts

Instructions
 

  • Cook soba noodles according to package directions. Rinse under cold water to cool. Set aside.
  • In a small mixing bowl, mix together all the peanut sauce ingredients with a whisk until sauce forms.
  • Chop your desired veggies.
  • To assemble, divide the noodles between 4 dishes and top with veggies and drizzle the peanut sauce on top.


is-vegetarian-diet-better-for-diabetes-photo

Is Vegetarian Diet Better for Diabetes

A variety of dietary patterns have been studied for people with diabetes. The type of diet a person chooses to follow is determined by their individual needs, preferences and abilities. There is no such thing as a perfect diet for people with diabetes.

New research shows the protective effects a plant-based diet can have on people at risk of developing diabetes or with existing diabetes. Vegetarians and vegans tend to live longer and have a lower risk of developing diabetes as well as other chronic conditions like heart disease, hypertension, certain types of cancers and obesity.

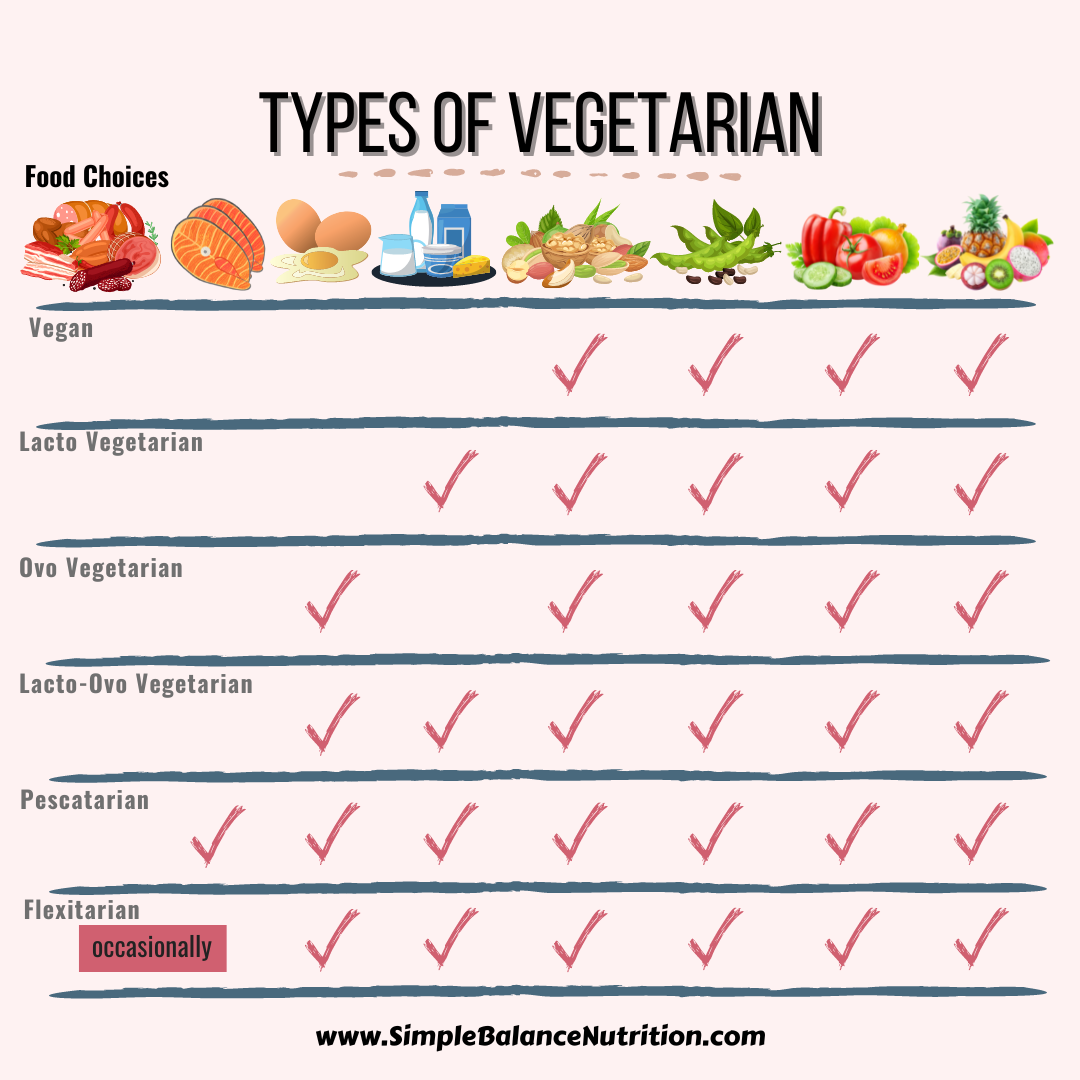
WHAT IS A PLANT BASED DIET? 

According to the Academy of Nutrition and Dietetics recent position paper, a well-planned vegetarian diet that is rich in whole grains, nuts, legumes, soy, seeds, fruits, and veggies can be nutritionally adequate and suitable for all life stages.

Plant based diet exclude most or all animal products. There is no single version of a vegetarian diet, but rather a spectrum of vegetarian patterns that vary with the types of animal products (eggs, fish, dairy) they include. People choose to follow a vegetarian lifestyle for many reasons including animal rights, environmental factors or for better health. That being said, vegetarian diets do not necessarily equate to a nutritious diet. A person can avoid animal meat, but still consume excess calories from French Fries and potato chips as they are considered vegetarian.

Below are 6 different types of vegetarian diets:

  1. Vegan: Excludes eggs, dairy or other animal-based products. Includes only foods from plants (fruits, vegetables, legumes, seeds, grains, and nuts).
  2. Lacto-vegetarian: Includes dairy products but no eggs.
  3. Ovo-vegetarian: Include eggs but no dairy products.
  4. Lacto-ovo-vegetarian: Includes eggs and dairy products.
  5. Pescatarian: Includes fish but no meat.
  6. Flexitarian (semi-vegetarian): Eat mostly a vegetarian diet with limited meat, eggs, and dairy products.

HOW A VEGETARIAN DIET CAN IMPROVE BLOOD SUGAR CONTROL

Vegetarian diets are naturally higher in fibre and lower in saturated fat than more traditional diets.

  • Higher fibre intake may help with weight loss as it makes you feel full for a longer time after eating, resulting in eating less overall.
  • Lower saturated fat intake can promote a healthier heart and prevent heart disease, which in common among people with diabetes.

Research suggests that well planned, vegetarian diets that are rich in whole grains, fiber, legumes, nuts, and unsaturated fats can help improve blood sugar and may even prevent diabetes.

HOW TO FOLLOW A VEGETARIAN DIET IF YOU HAVE DIABETES

Following a plant-based diet will not “cure” the diabetes. Diabetes is a very individualized chronic condition – what works for you may not work for another.

  • Talk to your Dietitian 

Vegetarians can be at risk for nutritional deficiencies, in particular, iron, vitamin B12, vitamin D and calcium. A dietitian will help you understand that fundamentals of vegetarian eating and teach you how to plan a well-balanced, nutritionally adequate vegetarian diet.

  • Watch your carbohydrates  

Vegetarian diet is not a low carb diet. Whole grains, vegetables, fruits and beans contain carbohydrates and will impact blood sugars.  People with diabetes still need to watch your portion sizes and read labels.

  • Choose high fibre grains

Avoid highly-processed carbohydrates like white flour, pastries, and white bread. Instead, choose high-fiber grains like quinoa, brown rice, bulgur, and oatmeal. These whole grains have a lower glycemic impact due to the fiber and additional protein content.

  • Load up the greens and colourful fruits

As a vegetarian, make sure you are consuming at least 7-8 servings of fruits and vegetables per day.  A good rule of thumb is to fill up half of your plate at every meal with vegetables.

  • Choose plant-based protein 

Protein remains an important nutrient for people with diabetes because it can stabilize blood sugars as well as help with satiety. Make sure you replace your animal-protein choices with plant-based protein such as  legumes, tofu, soy, nuts, and nut butter in every meal. For lacto-ovo vegetarians, eggs, cheese, yogurt, and milk are other nutritious sources of protein.

  • Choose healthy fats 

Vegetarian diet can be lacking in omega-3 fatty acids due to eliminating eggs and fish. If you don’t eat fish or eggs, you may need an omega-3 supplement (DHA/EPA) or choose foods rich in ALA (alpha linolenic acid) such as flaxseed, walnuts, canola oil.

BOTTOM LINE

Do you need to become vegan or eliminate all animal products to see health benefits? Not at all. The research clearly states that eating more fruits, whole grains, and less meat is associated with overall improved health.

If you’d like to experiment with this way of eating, I recommend starting out with the semi-vegetarian approach. Instead of eliminating meat altogether, start to gradually reduce the amount of meat you consume. If you typically eat meat for lunch and dinner, try eating it at dinner time and having a plant-based meal at lunch. See how that works for you.

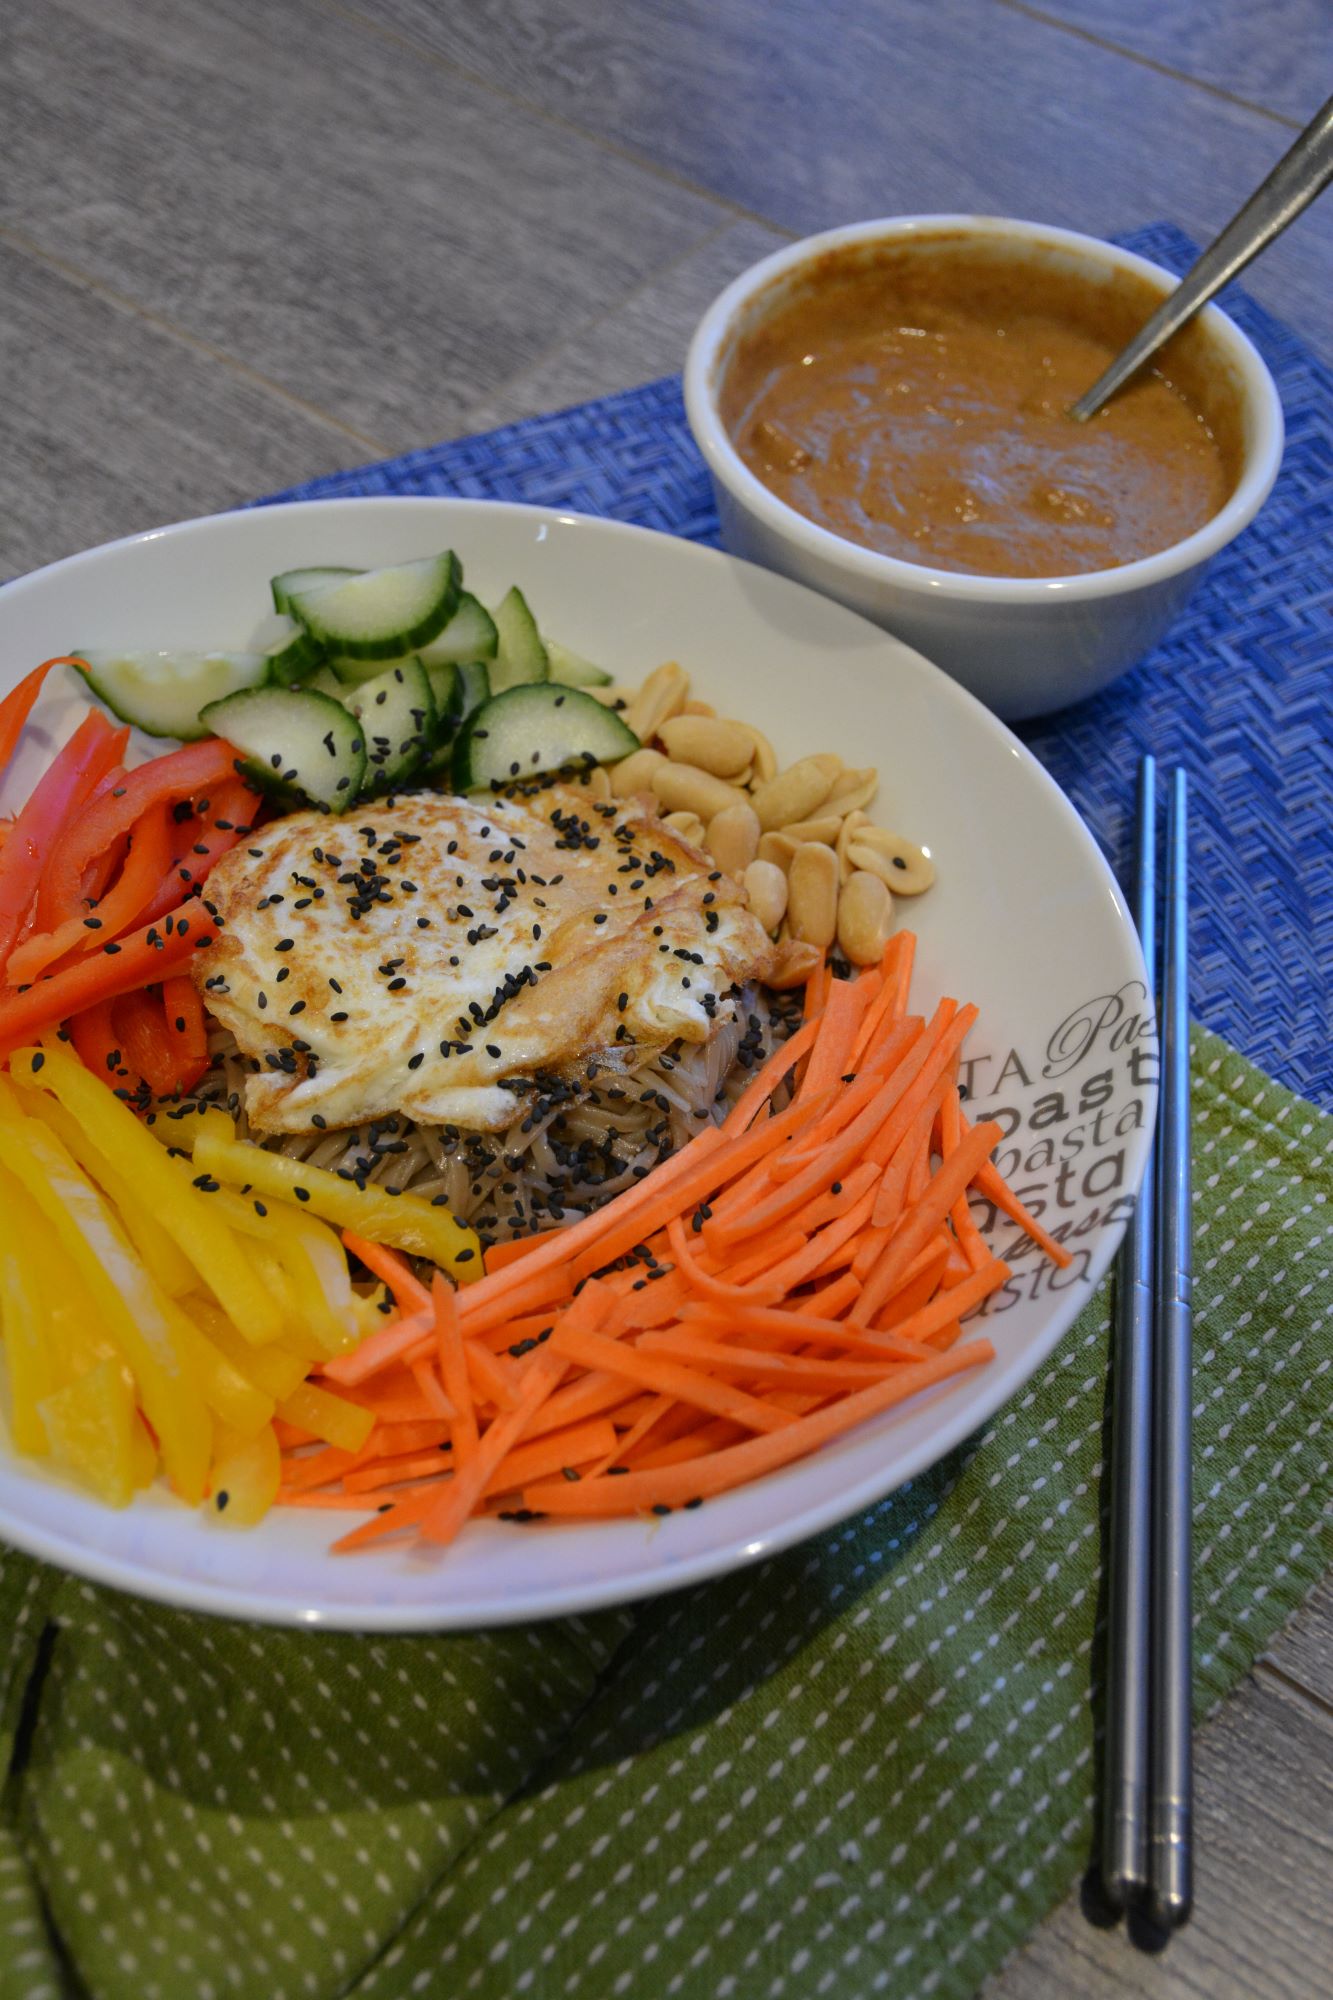
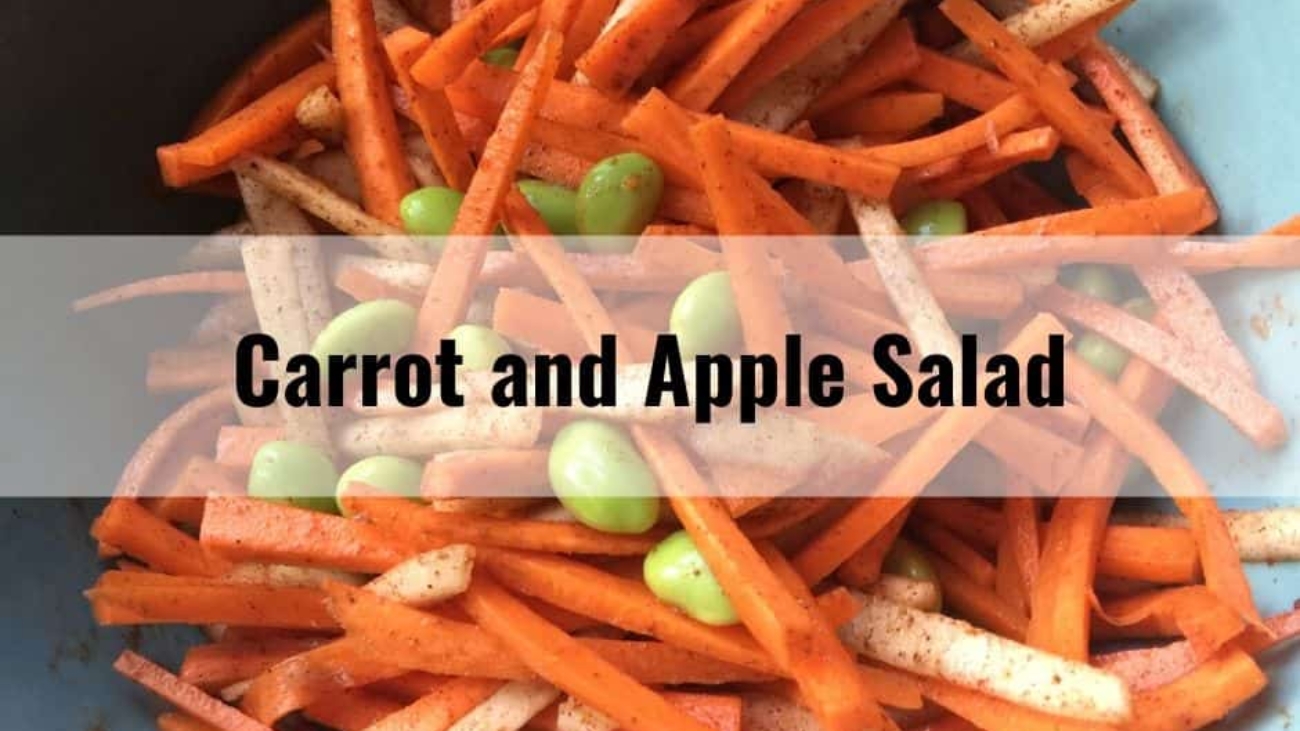
FOR EASY VEGETARIAN RECIPES:

Did you know that I offer personalized one-on-one nutrition counselling? If this is something you’s like to learn more about, check out my service.

Curry Yogurt Dressing

Curry Yogurt Dressing

I like to make versatile condiment to keep in my fridge for salads, wraps, sandwiches and crackers, like my Quick and Easy Chickpea Hummus.

In recent year, dinner bowls are super popular. I’ve been seeing other bloggers making fun versions of dinner bowls. I decided to take a shot at it and do something a little different from my boring green lettuce salad plate.

To be honest – there are quite a few steps that you will need to take to make this dish.  They’re not difficult or complicated steps, but there are steps.  Let’s break it down and talk about what you can do to make this easier for you.

First, the tempeh. You can definitely marinade the tempeh the day before you plan to eat these. Check out the recipe here. Then all you need to do is nicely place them in the oven during the last 30 minutes of the veggies roasting.

Then there’s the veggies.  They are no more than simple roasted veggies with some olive oil.  Nothing you haven’t done before.  This step is a breeze. The oven temperature is 400F, most veggies take about 40 mins.

And that’s it!  Besides putting it all together with the avocado and sesame seeds, you’ve got yourself a dinner bowl.

Enjoy !

Recipe adapted from Curry Yogurt Sauce

Are you a salad lover? Make this dressing and leave me a comment below to share your thought. 

Curry Yogurt Dressing

This curried yogurt dressing is spicy, creamy and flavorful, it goes well with any your favorite salad, or you can also serve it as a dip with a piece of cracker or fresh vegetables.
Prep Time 5 minutes
Cook Time 5 minutes
Total Time 10 minutes
Course Lunch, Supper
Servings 6 people

Ingredients
  

  • 1 tbsp Olive Oil
  • 1/4 cup chopped yelllow onion
  • 2 cloves garlic, minced
  • 1 1/2 tsp muchi curry powder
  • 3/4 cup plain full fat yogurt
  • 2 tbsp tahini
  • 1/2 tbsp fresh squeezed lime juice
  • Dash of smoked paprika
  • Salt and Ground Black Pepper, to taste

Instructions
 

  • Heat the olive oil in a non-stick skillet for 1 minute. Add the onion and cook for 2-3 minutes until tender and translucent.
  • Stir in the garlic and curry powder. Cook for one more minute until aromatic. Transfer to the single serving cup for your blender and allow to cool for a couple of minutes.
  • Add the rest of the ingredients to the blender cup and puree until smooth.
  • Store in an airtight container in the fridge.
Broccoli And Split Peas Salad With Turmeric Yogurt Dressing

Broccoli and Split Peas Salad with Turmeric Yogurt Dressing

I have to admit I didn’t know Canada is the leading PULSES producer in the world until I become a dietitian. The “Pulses Canada”  “Lentils” and “Pulses” are three of my favorite go to sites for delicious and healthy recipes.

Gather the ingredients !

Split peas are quick and easy to cook. They do not require soaking like other pulses.

Cooked on the stovetop similar to rice (rinse, simmer, serve). 45 minutes for split peas. One cup of dry split peas can yield 2 cups of cooked split peas.

If you are vegan or vegetarian, we can change the Greek yogurt to non-dairy yogurt (coconut or soy yogurt), and using soyanaise instead of mayonnaise, swap the honey to maple syrup.

This is a really great tasting salad and full of nutrition.

Enjoy !

Recipe adapted from Lentils.org

If you like this recipe, you might also want to try this delicious Black Bean Quinoa Salad with Lime Dressing

Broccoli And Split Peas Salad With Turmeric Yogurt Dressing

This simple and easy salad is the perfect solution to your next BBQ or picnic – and leftovers make for easy lunches the next day!
Prep Time 10 minutes
Cook Time 20 minutes
Total Time 30 minutes
Course Lunch, Supper
Servings 6 people

Ingredients
  

SALAD

  • 1 head broccoli
  • 1 cup halved cherry tomatoes
  • 1 cup cooked yellow split peas
  • 1/4 cup almonds, sliced

DRESSING

  • 1/4 cup Greek Yogurt, 2%MF
  • 1/4 cup mayonnaise
  • 2 tsp honey (or maple syrup)
  • 1 tsp white wine vinegar
  • 1/4 tsp turmeric, ground
  • salt & pepper to taste

Instructions
 

  • Whisk dressing ingredients together in a small bowl. Season with salt and pepper and reserve.
  • Combine salad ingredients together. Toss dressing with the salad, season with salt and pepper, and garnish with toasted almonds.

Notes

If you’re soy-free you could try using coconut yogurt instead of the soy yogurt. It will have a slightly different taste but will almost certainly still be delicious.
Carrot And Apple Salad

Carrot and Apple Salad

There’s no cooking required with this Carrot & Apple Salad; all raw ingredients! You can prepare this recipe in last minute when you needed something quick for lunch. Everyone really enjoyed it. It makes for a very good side dish.

This salad is quick, easy and delicious. My family approved.

Enjoy !

For quick and easy recipes as well as nutrition tips for families, check out my Facebook Page where I post daily. 


Carrot And Apple Salad

This is a great side dish for lunch and supper.
Prep Time 5 minutes
Cook Time 5 minutes
Total Time 10 minutes
Course Dinner, Lunch
Cuisine Gluten Free, Vegan, Vegeterian
Servings 2 cups

Ingredients
  

  • 2 carrots, peeled, cut into matchstick
  • 1 large apple, peeled, cut into matchstick
  • 1/2 cup soybeans (edamame), cooked
  • 1 tbsp lemon juice
  • 1 tsp cinnamon
  • 1 tsp honey

Instructions
 

  • Add soybeans to a small saucepan of boiling water. Cover and and simmer for 2 minutes. Drain and place in a large bowl.
  • Combine carrots, apples, edamame, lemon juice, honey and cinnamon. Stir to coat well.
Simple And Easy Dahl

Simple and Easy Dahl

In Malaysia, Roti Canai and Dhal Curry are often eaten during breakfast. This recipe probably took me thirty minutes to make from start to finish.

Dhal curry is a very mild and nutritious curry made up mainly of lentils, tomatoes, and chilies. Sometimes potatoes are added. Very few spices are used and the heat level can be adjusted by using more or less dried chilies. This curry is very kid friendly as it can be made relatively mild.

Enjoy !

This recipe is incredibly simple and so delicious. Let me know what you think. 

Simple And Easy Dahl

This recipe uses very inexpensive ingredients to create a very tasty dish. It can serve with rice or whole wheat naan bread or chapatis. Great source of protein, fibre and iron.
Prep Time 10 minutes
Cook Time 30 minutes
Total Time 40 minutes
Course Dinner, Lunch
Cuisine Vegan, Vegeterian
Servings 4

Ingredients
  

  • Oil for frying
  • 1 medium onion, chopped
  • 2 garlic cloves, finely chopped
  • 1/2 tsp turmeric
  • 1/2 tsp ground cumin
  • 1/2 tsp chili powder
  • 1 cup yellow lentils, rinse thoroughly in cold water and drained
  • 1/2 tsp ground cinnamon
  • 3 1/3 cups water
  • 2 tbsp lemon juice
  • 1 tbsp chopped fresh cilantro (optional)

Instructions
 

  • Heat the oil in a saucepan, add the onion, and fry until soft.
  • Add the garlic and fry for another minute or two, then stir in powdered spices.
  • Add the lentils and cinnamon, with enough water to cover them. Bring to a boil, stirring occasionally, then turn down the heat, cover and simmer for 25-30 minutes, continuing to stir occasionally until the lentils are soft by not mushy.
  • Add lemon juice and stir well.
  • Sprinkle with the chopped cilantro and serve warm with rice, naan bread or chapatis.
Marinated Peanut Butter Tempeh

Marinated Peanut Butter Tempeh

Tempeh is a soy product that originated in Indonesia. It is made by taking whole soybeans, soaking them until softened, slightly cooking them, and then fermenting them so that they form a solid block. Unlike tofu, tempeh is minimally processed, so the soybeans are intact in the final product. The outside texture of the tempeh has a white film which is totally normal.

A 1/2 cup serving of tempeh has 160 calories, 15 grams of protein, 7 grams fiber, and 2 net grams of carbohydrate.

Tempeh has a slightly nutty flavor and crumbles easily so it makes a great substitute for ground meat in recipes. Tempeh is sold in the refrigerated section of the store near the rest of the meatless options and tofu.

To remove bitterness from the tempeh, add to a saucepan filled with 1 inch of water and bring to a low boil over medium heat. Steam tempeh for a total of 10-12 minutes, flipping once at the halfway point. Then rinse and pat dry.

Mix marinade by adding sesame oil, peanut butter, tamari, lime juice, and maple syrup. Whisk to combine.

Add the sliced tempeh to the marinade and toss to coat.

Use tempeh the same way you might use tofu or other meat alternatives in recipes like salads, casseroles, soups, etc. Tempeh holds its form well when sliced or cubed. You can also crumble it into smaller pieces and cook it up as an alternative to ground meat in dishes.

Enjoy !

Are you a vegetarian or vegan? What are your favorite plant-based protein foods? Please share this recipe if you like it. 

Marinated Peanut Butter Tempeh

Marinated tempeh coated with a rich and creamy peanut sauce. Serve over rice with leafy greens for a complete meal!
Prep Time 1 day
Cook Time 30 minutes
Total Time 1 day 30 minutes
Course Dinner, Lunch
Cuisine Gluten Free, Vegan, Vegeterian

Ingredients
  

  • 8 ounces tempeh (if GF, ensure gluten-free friendly)

SAUCE

  • 1 1/2 tbsp sesame oil (if avoiding oil, leave this out and add a bit more lime, soy sauce, and maple syrup)
  • 2 tbsp unsalted peanut butter (or almond, cashew, or sunflower butter)
  • 2 tbsp gluten-free tamari (or soy sauce if not GF)
  • 2 tbsp lime juice
  • 3 tbsp maple syrup

Instructions
 

  • Cut into bite-size pieces. I prefer cutting into small triangles. (The smaller the pieces, the better they can soak up the marinade.)
  • To remove bitterness from the tempeh, add to a saucepan filled with 1 inch of water and bring to a low boil over medium heat. Steam tempeh for a total of 10-12 minutes, flipping once at the halfway point. Then rinse and pat dry. Set aside.
  • Mix marinade by adding sesame oil, peanut butter, tamari, lime juice, and maple syrup. Whisk to combine. Taste and adjust flavor as needed, adding more maple syrup for sweetness, lime juice for acidity, or tamari for saltiness. Don’t be shy – you want this extremely flavorful!
  • Add the sliced tempeh to the marinade and toss to coat. Then cover and refrigerate for at least 2 hours, preferably 24 hours. I found that 24 hours infused the most flavor! While marinating, toss/stir occasionally to ensure even coating. (Tip: Just before baking, drizzle with a bit more maple syrup and tamari for extra flavor. Optional but recommended!)
  • Once marinated, preheat oven to 375 degrees F (190 C) and line a baking sheet with parchment paper. Add tempeh and reserve any leftover marinade to brush/coat the tempeh once baked.
  • Bake for 22-30 minutes or until caramelized and deep golden brown. Remove from oven and brush/coat with any remaining marinade.
  • This tempeh is delicious for adding to Asian-inspired dishes like spring rolls, salads, and noodle dishes! Store leftovers covered in the refrigerator up to 3 days. Best when fresh.
Sunday Apple Pancakes

Sunday Apple Pancakes

As parents, we all know how important breakfast is, both for ourselves and our kids. Having breakfast within an hour of waking up gives us the energy we need to start the day, kick-starts our metabolisms, helps us focus and concentrate all morning, and can even control our appetites and cravings all day, preventing unhealthy snacking later (especially when breakfast includes enough protein). This, in turn, helps us to reach a healthier weight.

Making pancakes has become a fun morning activity that we do on weekend! The pancake recipe doesn’t require any special ingredients – just egg, flour, milk, butter and baking powder, and you top up with what you have in the house.

TIPS to MAKE PERFECT PANCAKES

To ensure fluffy, delicious pancakes I follow these tips

  • Mix the dry and wet ingredients separately. – Mix the dry ingredients in one bowl and the wet in another bowl. Pour the wet into the dry.
  • Just Barely Mix – You should still see some small and medium-sized lumps in the batter. If it is too smooth you risk your pancakes being dense. Add the apples and stir until just combined.
  • Get the right heat – I find a medium heat is perfect for this pancake. This will vary depending on your stove. Make a small test pancake first to check the temperature. If the outside is scorched and the inside is still raw then turn down the heat.
  • Wait for the bubbles – Flip the pancakes only once bubbles form on the top. The other side will cook quicker, cook until golden.

This recipe makes a dozen. There is no way that we can eat that many pancakes. No problem though! There are a couple ways to handle this.

HOW TO STORE APPLE PANCAKES

Apple pancakes are a great make-ahead food and they can be enjoyed cold or re-heated easily.  Allow the pancakes to cool to room temperature before storing.

  1. Refrigerating Apple Pancakes
    • Once cool, store in an airtight container and refrigerate.
  2. Freezing Apple Pancakes
    • Place the pancakes on a baking tray, so they are close together but not touching. Place in the freezer until frozen, around 30 mins. Then transfer to a freezable container.

You can re-heat apple pancakes, from frozen, in  the

  1. Microwave (around 15sec for 1 pancake)
  2. Oven ( 350F/175C), place on a tray, cover with foil and heat for 10 mins.

The best way is eat what you can, and freeze the rest. This is what I normally do, because that means we can have pancakes any time. These pancakes take just a few seconds in the microwave to defrost.

These pancakes are the perfect grab and go breakfast, lunch, or snack for a toddler. Pancakes are easy to pack up and bring with you out, and these healthy pancakes are great to eat in strollers. They don’t drop crumbs everywhere, and they don’t leave behind sticky fingers. The pancakes themselves are also easy (and clean) for baby-led weaning.

Have you tried this recipe? I love to receive feedback! Please comment below or tag me on Instagram or Facebook.

Sunday Apple Pancakes

These pancakes are so easy to make, healthy and nutritious, and freeze well.
Prep Time 10 minutes
Cook Time 25 minutes
Total Time 35 minutes
Course Breakfast
Servings 12

Ingredients
  

  • 1/4 cup butter, melted
  • 1 egg (you can use flax egg)
  • 1 cup milk (you can use plant-based milk - almond milk/soy milk)
  • 1 cup apple, shredded
  • 1 1/4 cups all-purpose flour (1 mix whole wheat flour & white flour)
  • 1 1/4 tsp baking powder
  • 1/4 tsp ground cinnamon
  • 1 tbsp white sugar (optional)

Instructions
 

  • In a large bowl, combine butter, egg, milk and apple.
  • In a separate bowl, sift together flour, baking powder, cinnamon and sugar.
  • Stir flour mixture into apple mixture, just until combined.
  • Heat a lightly oiled griddle or frying pan over medium high heat. Pour or scoop the batter onto the griddle, using approximately 1/4 cup for each pancake. Brown on both sides and serve hot.
Black Bean Quinoa Salad With Lime Dressing

Black Bean Quinoa Salad with Lime Dressing

Quinoa is an easy grain to love. If you are unfamiliar with quinoa (pronounced KEEN-wah) you can check out my last post that I talked about what it is, where it is found and how to use it!

This Black Bean Quinoa Salad is fresh, delicious and packed with colorful veggies.

Enjoy !

If you like this recipe, you might also want to try this delicious Colourful Edamame Sesame Quinoa Salad.

Black Bean Quinoa Salad With Lime Dressing

Prep Time 13 minutes
Cook Time 15 minutes
Total Time 28 minutes
Course Dinner, Lunch
Cuisine Gluten Free, Vegan
Servings 8

Ingredients
  

  • 1 cup quinoa, rinsed
  • 2 cups vegetable broth (or water)
  • 1 can black beans, drained and rinsed
  • 1 cup orange pepper, chopped
  • 1 cup grape tomatoes, quartered
  • 1 cup corn, cooked

Dressing

  • 3 tbsp lime juice, fresh
  • 2 tbsp extra virgin olive oil
  • 2 garlic cloves, minced
  • 1 tsp cumin, ground
  • 1 tsp oregano, dried
  • 1/2 tsp salt
  • 1/4 tsp black pepper, ground

Instructions
 

  • Rinse the quinoa just before cooking.
  • In a saucepan, bring 2 cups vegetables broth to a boil. Add quinoa and reduce the heat to low. Cover and simmer for 20 minutes until the broth is absorbed and the quinoa is tender.
  • In a small bowl, whisk together all the dressing ingredients
  • In a large bowl, combine quinoa, black beans, orange peppers, tomatoes, corn. Toss with the dressing.
  • Enjoy immediately, or store in a covered container for later.
Cauliflower Crusted Pizza

Cauliflower Crusted Pizza

Cauliflower crusted pizza is so delicious, easy to make, and low in calories that you will want to add this recipe to your “make it often” repertoire!

Chop all the cauliflower florets into small pieces.

Steam and blend the riced cauliflower until smooth.

Place the cooked and riced cauliflower in paper towels to remove all excess water.

Place the cooked and dried cauliflower in a mixing bowl. Combine the remaining ingredients.

Spread the cauliflower crust in a thick rectangle. Baked the cauliflower crust in the oven for 20 minutes at 450 degree F. It is done when it is golden brown on the top and crispy on the edges.

I top with salsa. Do not add too much or you will make the crust soggy. Bake for 10-15 minutes at 400 degree F until the cheese is melted and golden. Remove from the oven.

Enjoy !

Recipe Adapted from NutritionStripped

For quick and easy recipes as well as nutrition tips for families, check out my Facebook Page where I post daily.

Cauliflower Crusted Pizza

A naturally gluten-free, vegetarian, friendly pizza crust made only from cauliflower to be topped with you favourite toppings.
Cuisine Gluten Free, Paleo, Vegan

Ingredients
  

  • 1 small head cauliflower (550-600g), before steaming
  • 2 whole eggs (or use chia eggs)
  • 3 tbsp nutritional yeast (or use dairy cheese)
  • 1 tbsp all purpose flour
  • 1 tbsp chia seed
  • 1 garlice clove, minced
  • 1 tsp sea salt
  • 1/2 tsp dried basil
  • 1/2 tsp dried oregano
  • fresh ground black pepper

Instructions
 

  • Preheat oven to 450 degrees F with a pizza stone.
  • To create the pureed cauliflower, simply chop all the cauliflower florets into small pieces.
  • Lightly steam cauliflower for 3-5 minutes or until slightly soft, place into blender and blend until smooth. (You have an option of leaving this a bit chunky or smooth if you prefer)
  • Place the lightly steamed cauliflower into a nut-milk bag//cheesecloth//paper towels over a large bowl (to catch the liquid) and squeeze the excess water from the cauliflower.
  • Let the cauliflower sit within the nut-milk//cheesecloth//paper towel for about 5 minutes, returning to squeeze any further water.
  • Discard the cauliflower liquid. The end result will resemble a firm puree.
  • Combine the remaining ingredients into the large bowl and hand mix with a large spoon or whisk until thoroughly combined.
  • Spread the “dough” into either 1 large pizza shape or 2 small pizza rounds on a piece of parchment paper that will be transferred to the hot pizza stone.
  • Avoid spreading the “dough” too thin as the moisture will cause it the crack and pull away from rest of the dough, I like leaving mine about 1/2 inch thick.
  • Bake at 450 degrees for about 20 minutes, until the top is golden brown and firm to touch. You can flip this half way through the baking process to make sure both sides are cooked well to your liking. Note: Be careful when flipping, this is very fragile “dough”.
  • Take out of the oven and top with your favorite toppings.
  • Bake for another 10-15 minutes at 400 degrees or until everything on the top has warmed and melted.
  • Enjoy!

Notes

Thin Crust: Simply spread the mixture to a thinner thickness. You may also turn over the crust mid way through the baking process to help “dry” out the bottom so both sides are “crispier”.
 
Baking: All ovens are different, and the time may take longer if you choose to make a thicker dough. Use a chia egg to make vegan.
 
Toppings: Some toppings are more moist than others, this will require more baking after you’ve put on the toppings [br]Nutritional Yeast: it is optional. It’s purely used for taste. Perfect for non-dairy lovers as it has a cheesy flavour and is loaded with B vitamins and protein.